
iPhone eSIM Setup Guide
Follow the video, or use the step-by-step guide below. You can install your eSIM any time before you travel.
Before you start
- Install at home before you fly. You can set up your eSIM any time before your trip while connected to WiFi. Your plan's days don't start counting until you first connect to a network at your destination — so there's no downside to installing early.
- Stay connected to WiFi (or another internet connection) for the whole setup process.
Install your eSIM
Open your order page
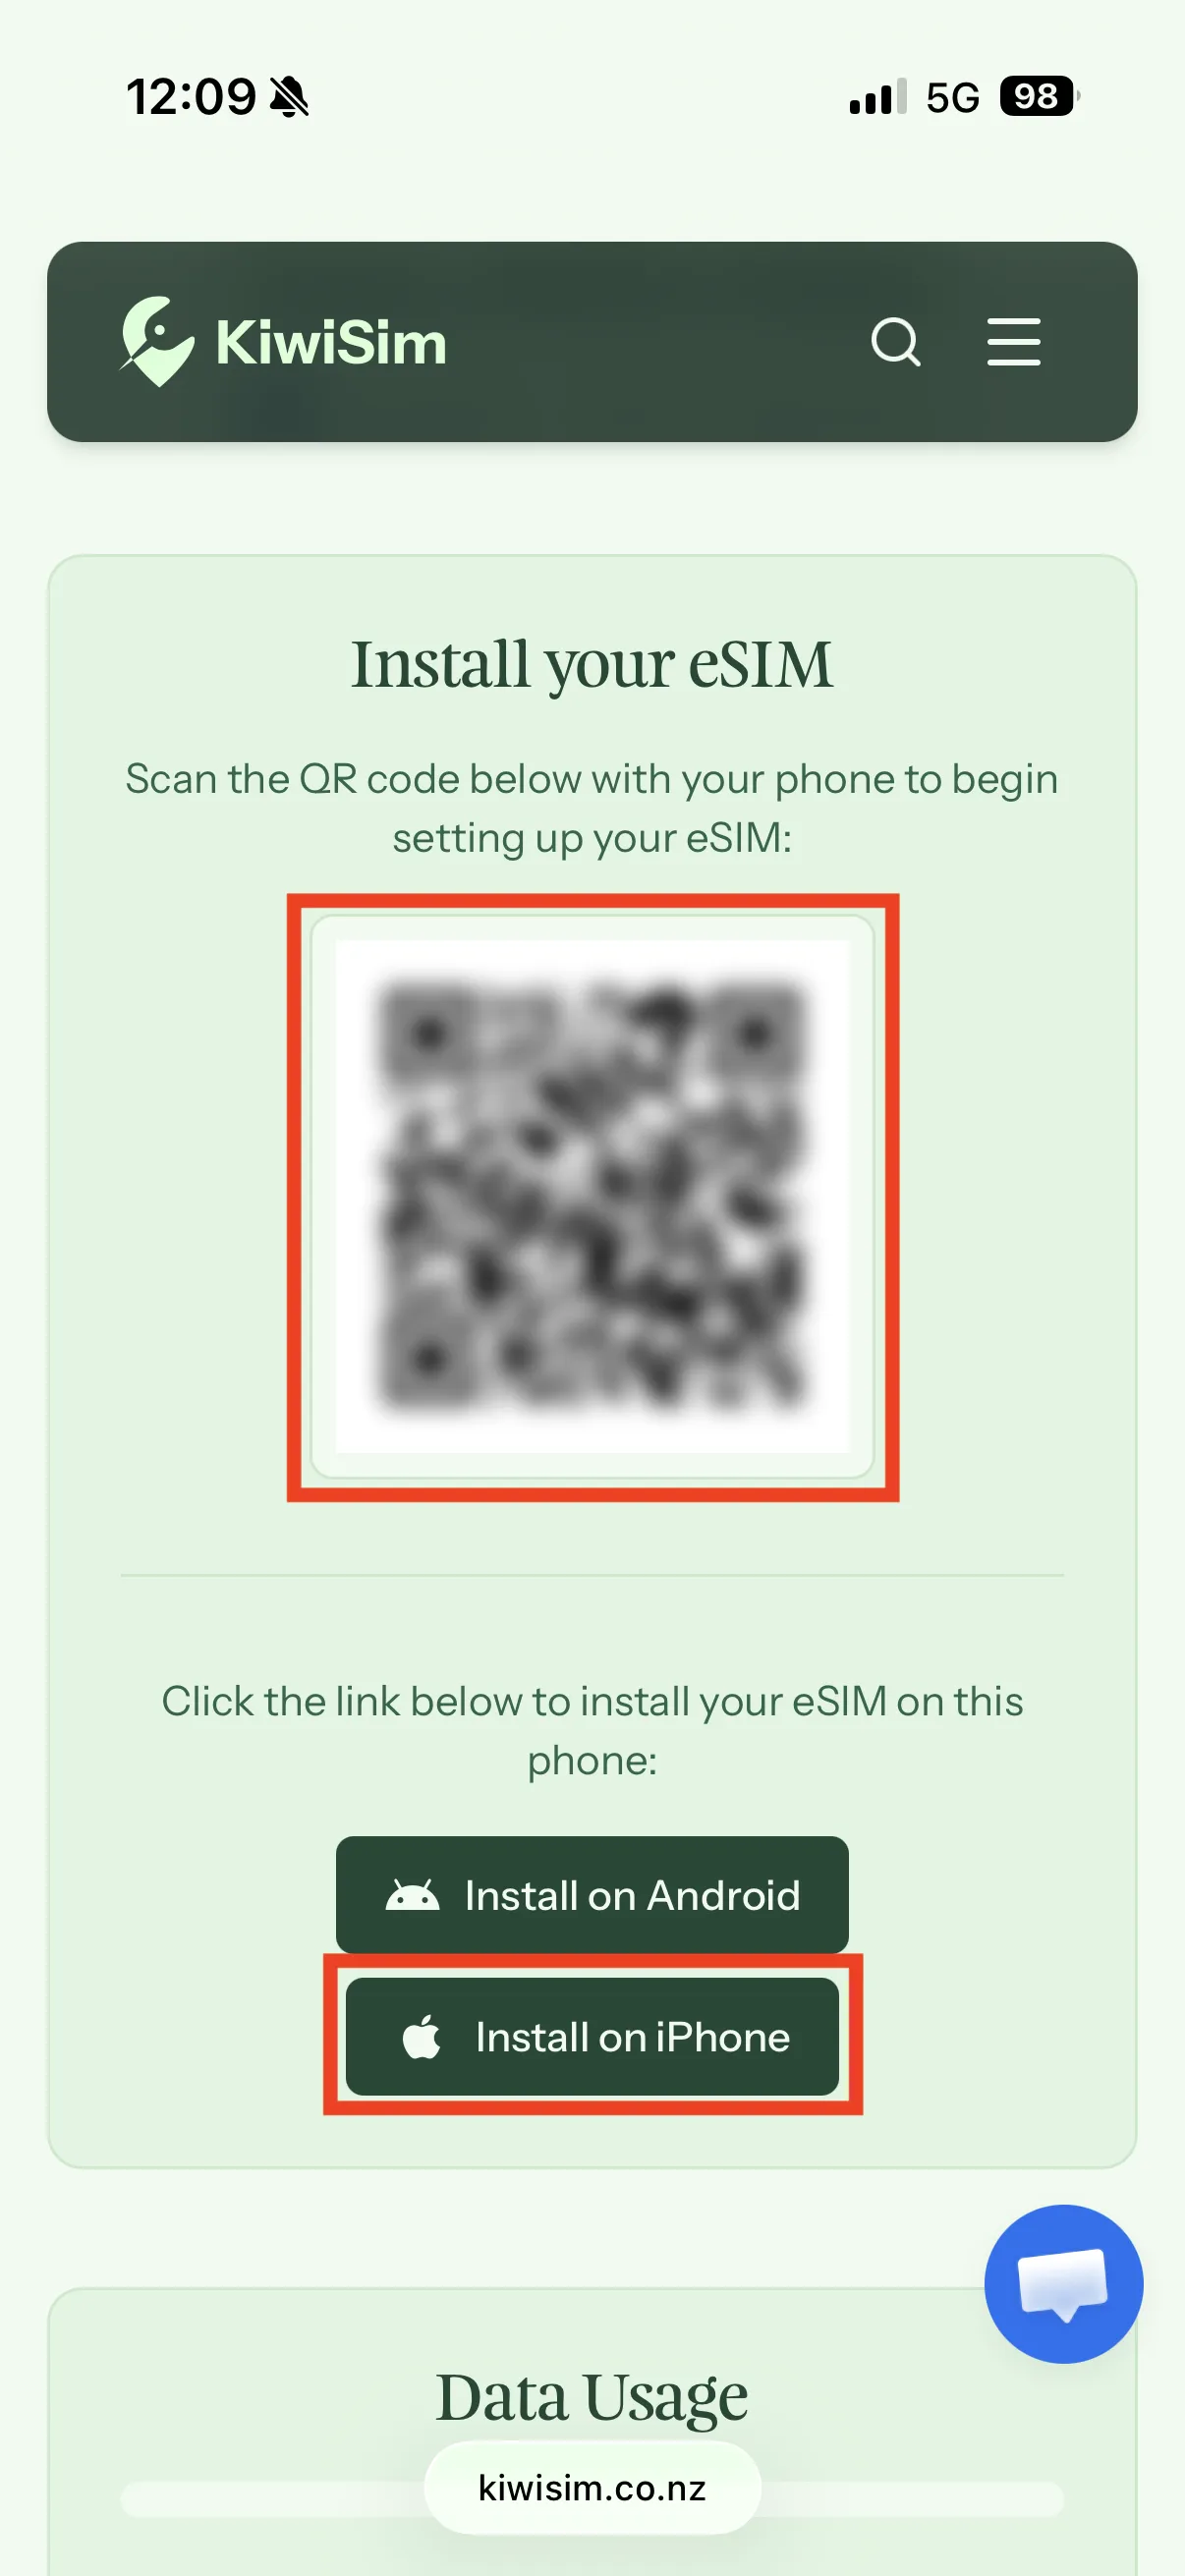
On your iPhone, tap the "Install on iPhone" button. If your order page is open on another device (like a laptop), open the Camera app on your iPhone and scan the QR code instead.
Start activation
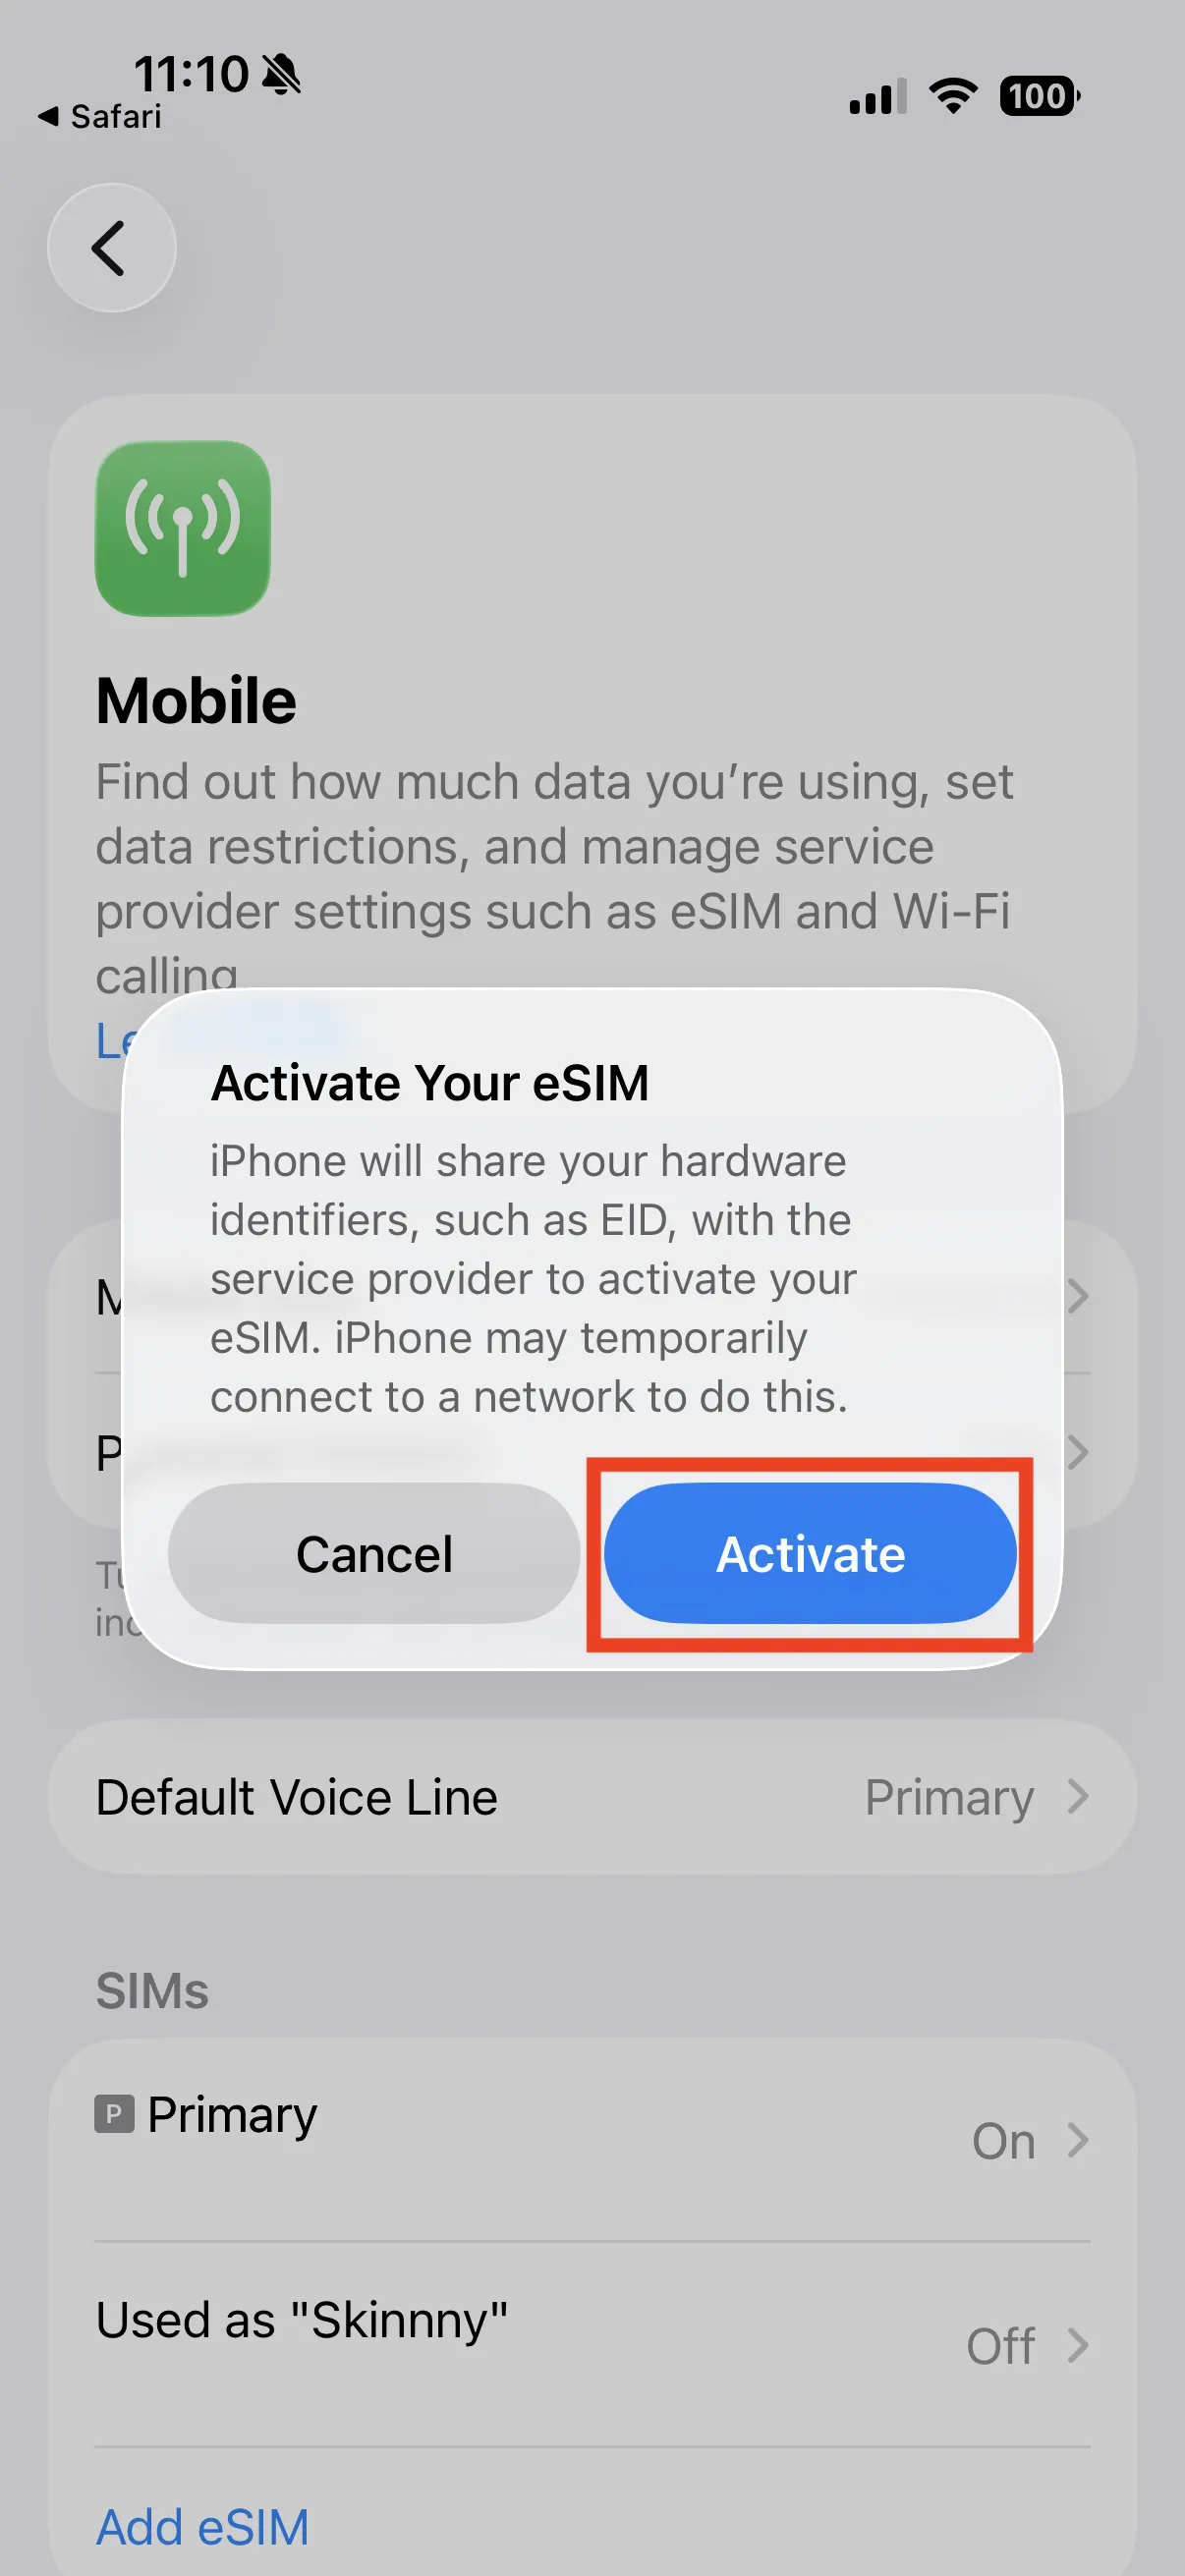
Your iPhone opens Settings and shows an "Activate eSIM" dialog. Tap "Activate" to begin.
Wait for it to activate
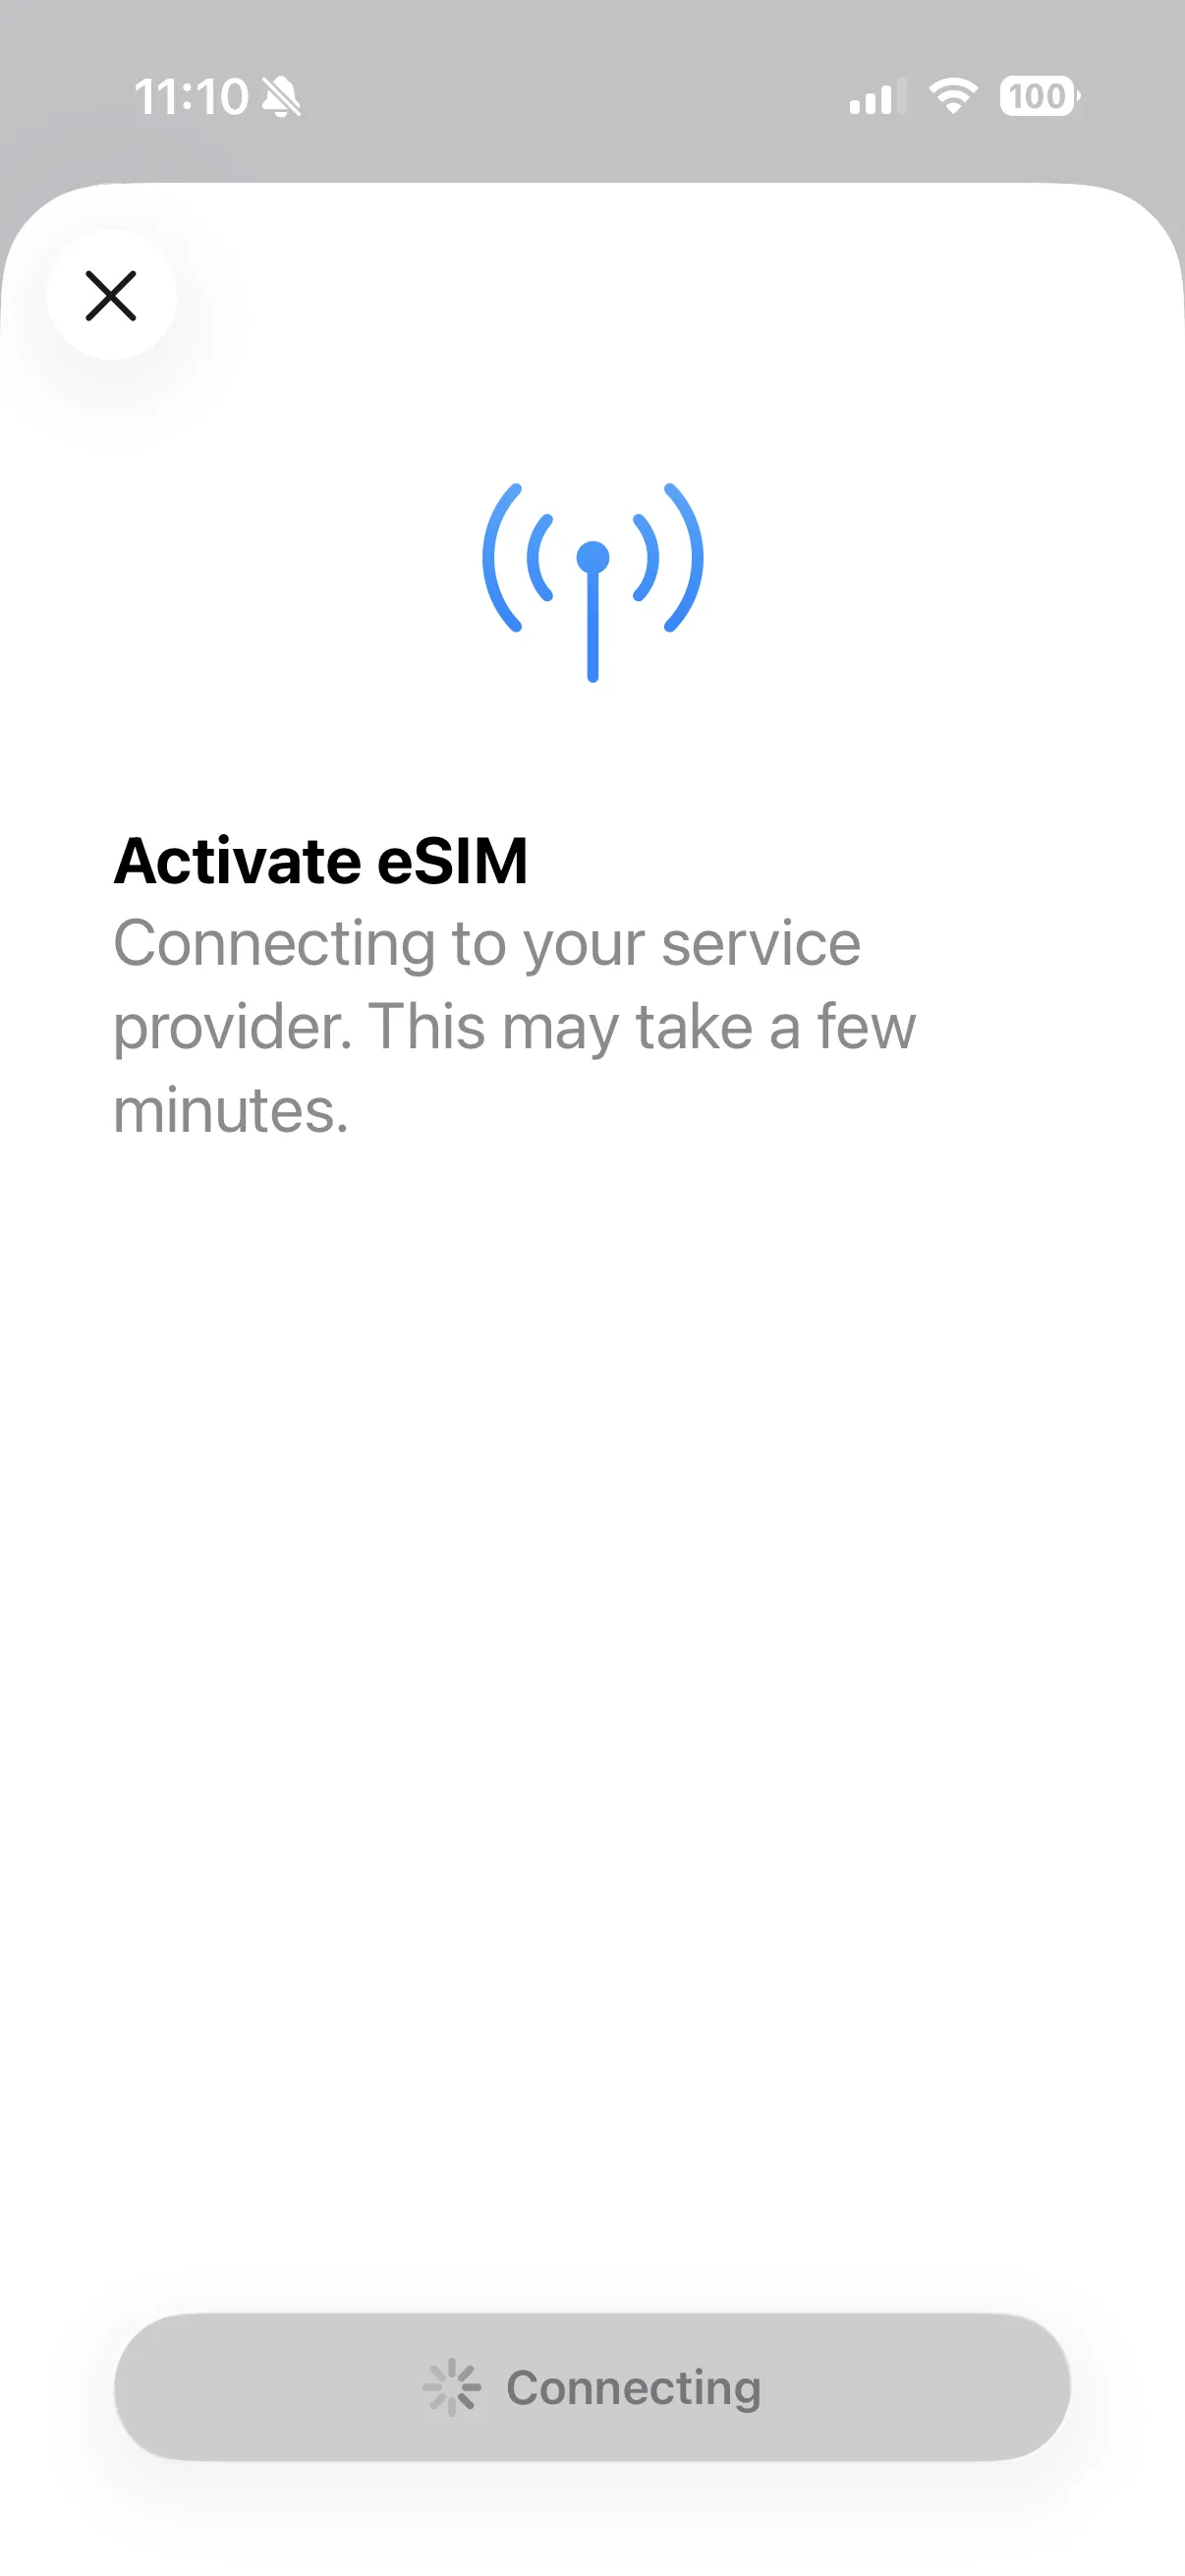
Your iPhone activates the eSIM. You may be asked to tap "Continue" — this can take a few minutes, so please be patient.
Choose "Data Only" if asked
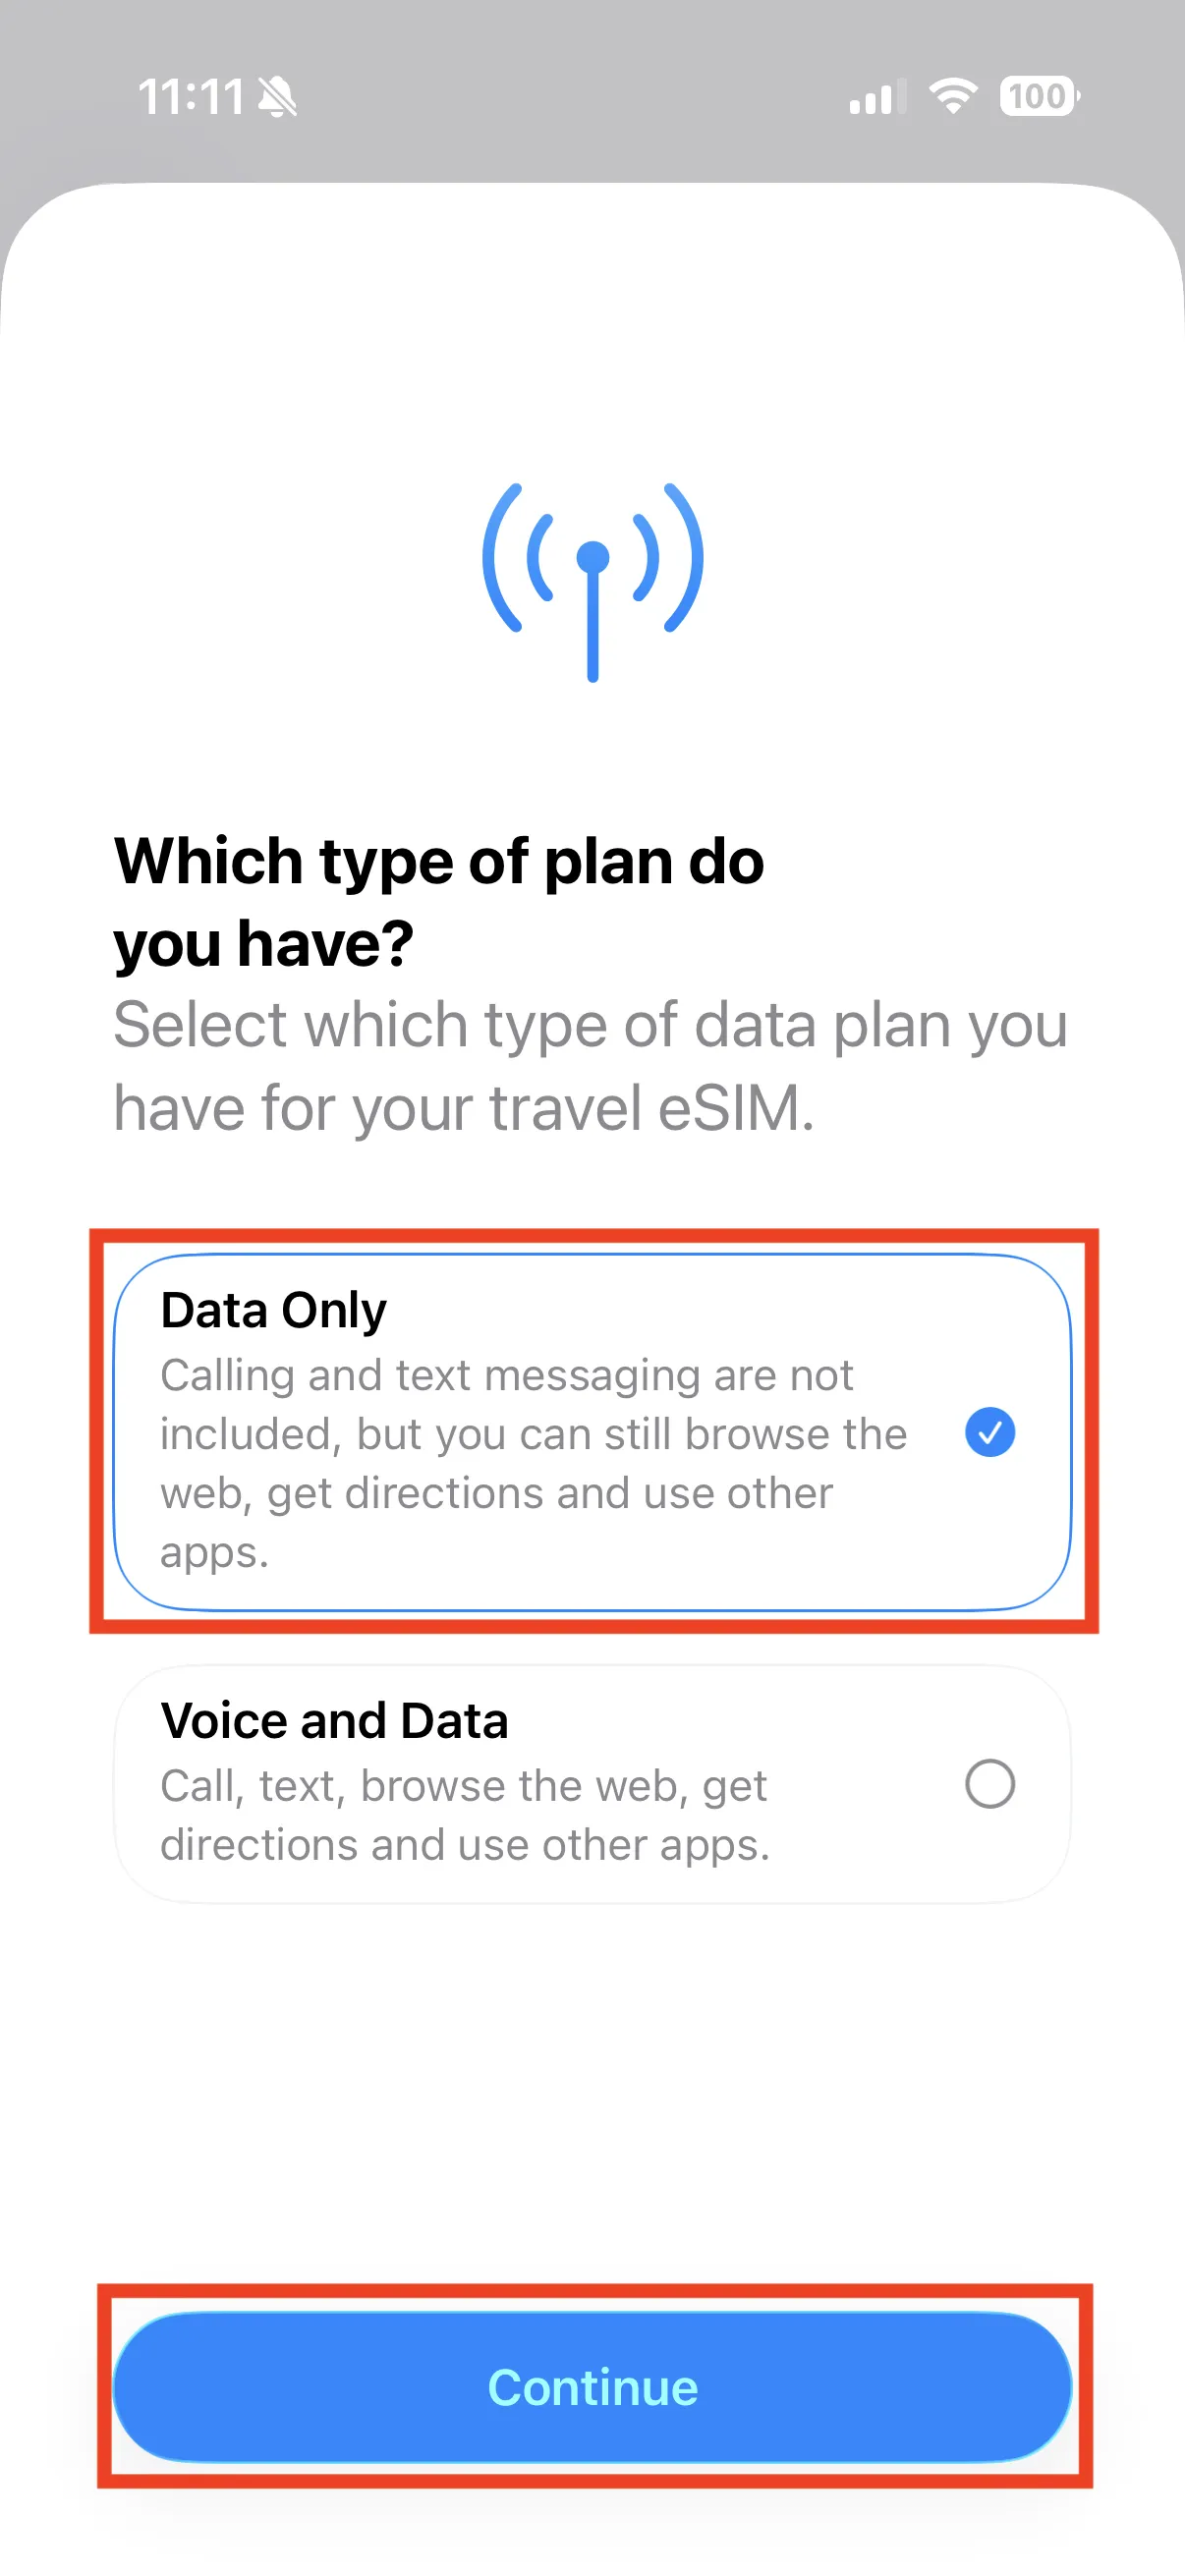
If a plan-type prompt appears, choose the "Data Only" option and continue. If you don't see this screen, don't worry — just skip ahead.
Finish activation
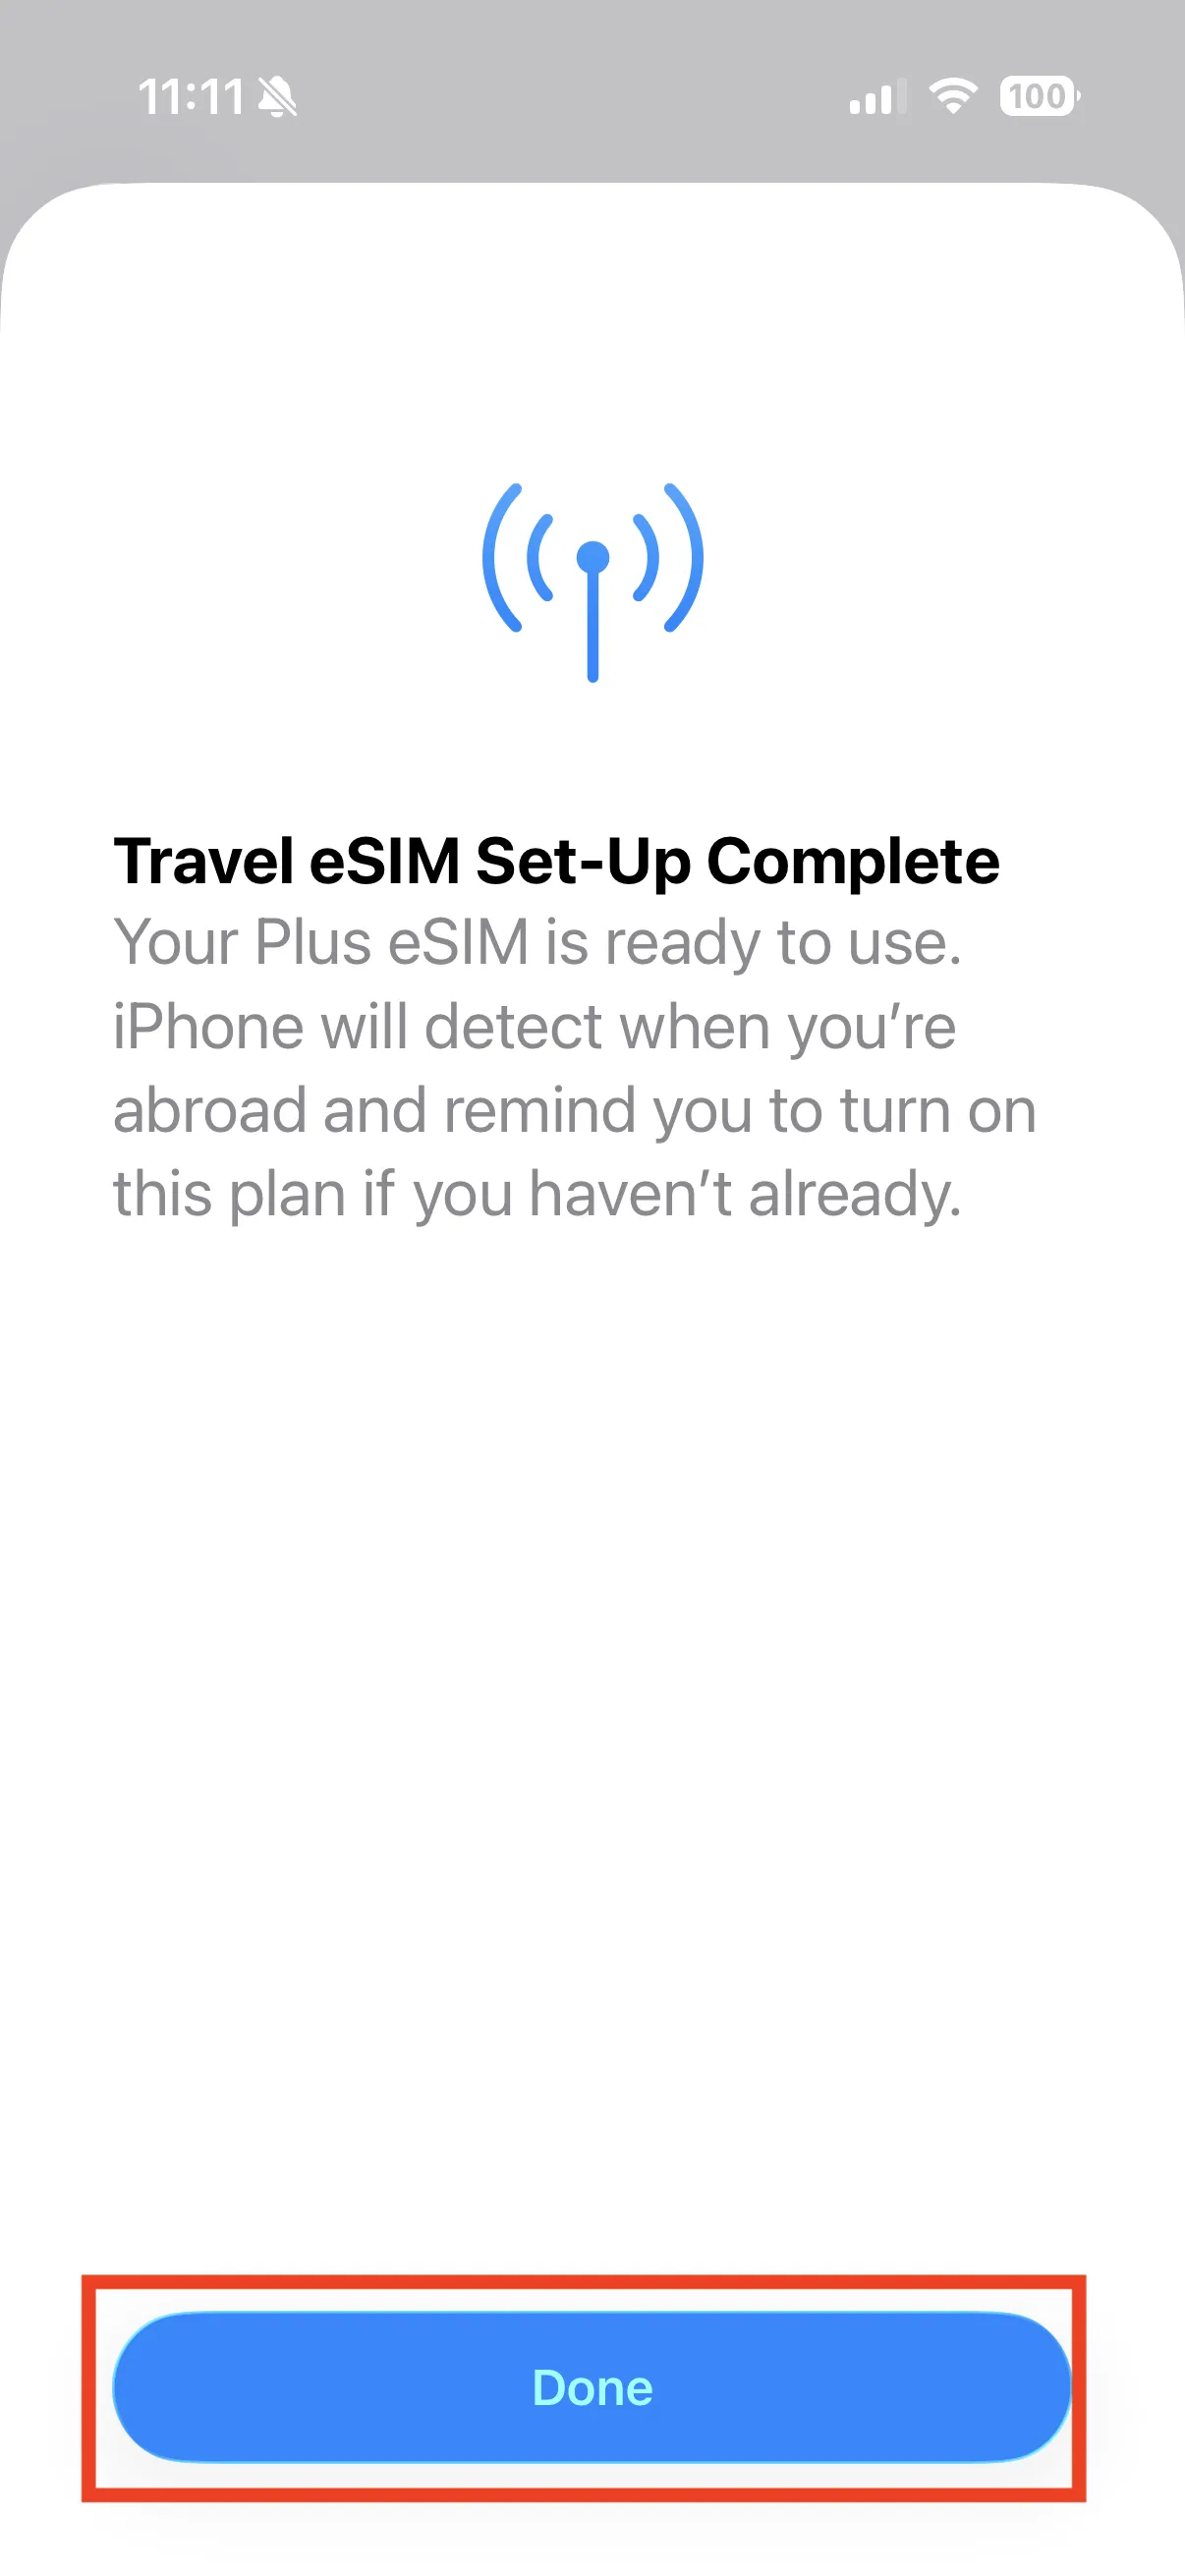
When the success screen appears, tap "Done" to return to your mobile settings.
Set up your eSIM
Find your new eSIM
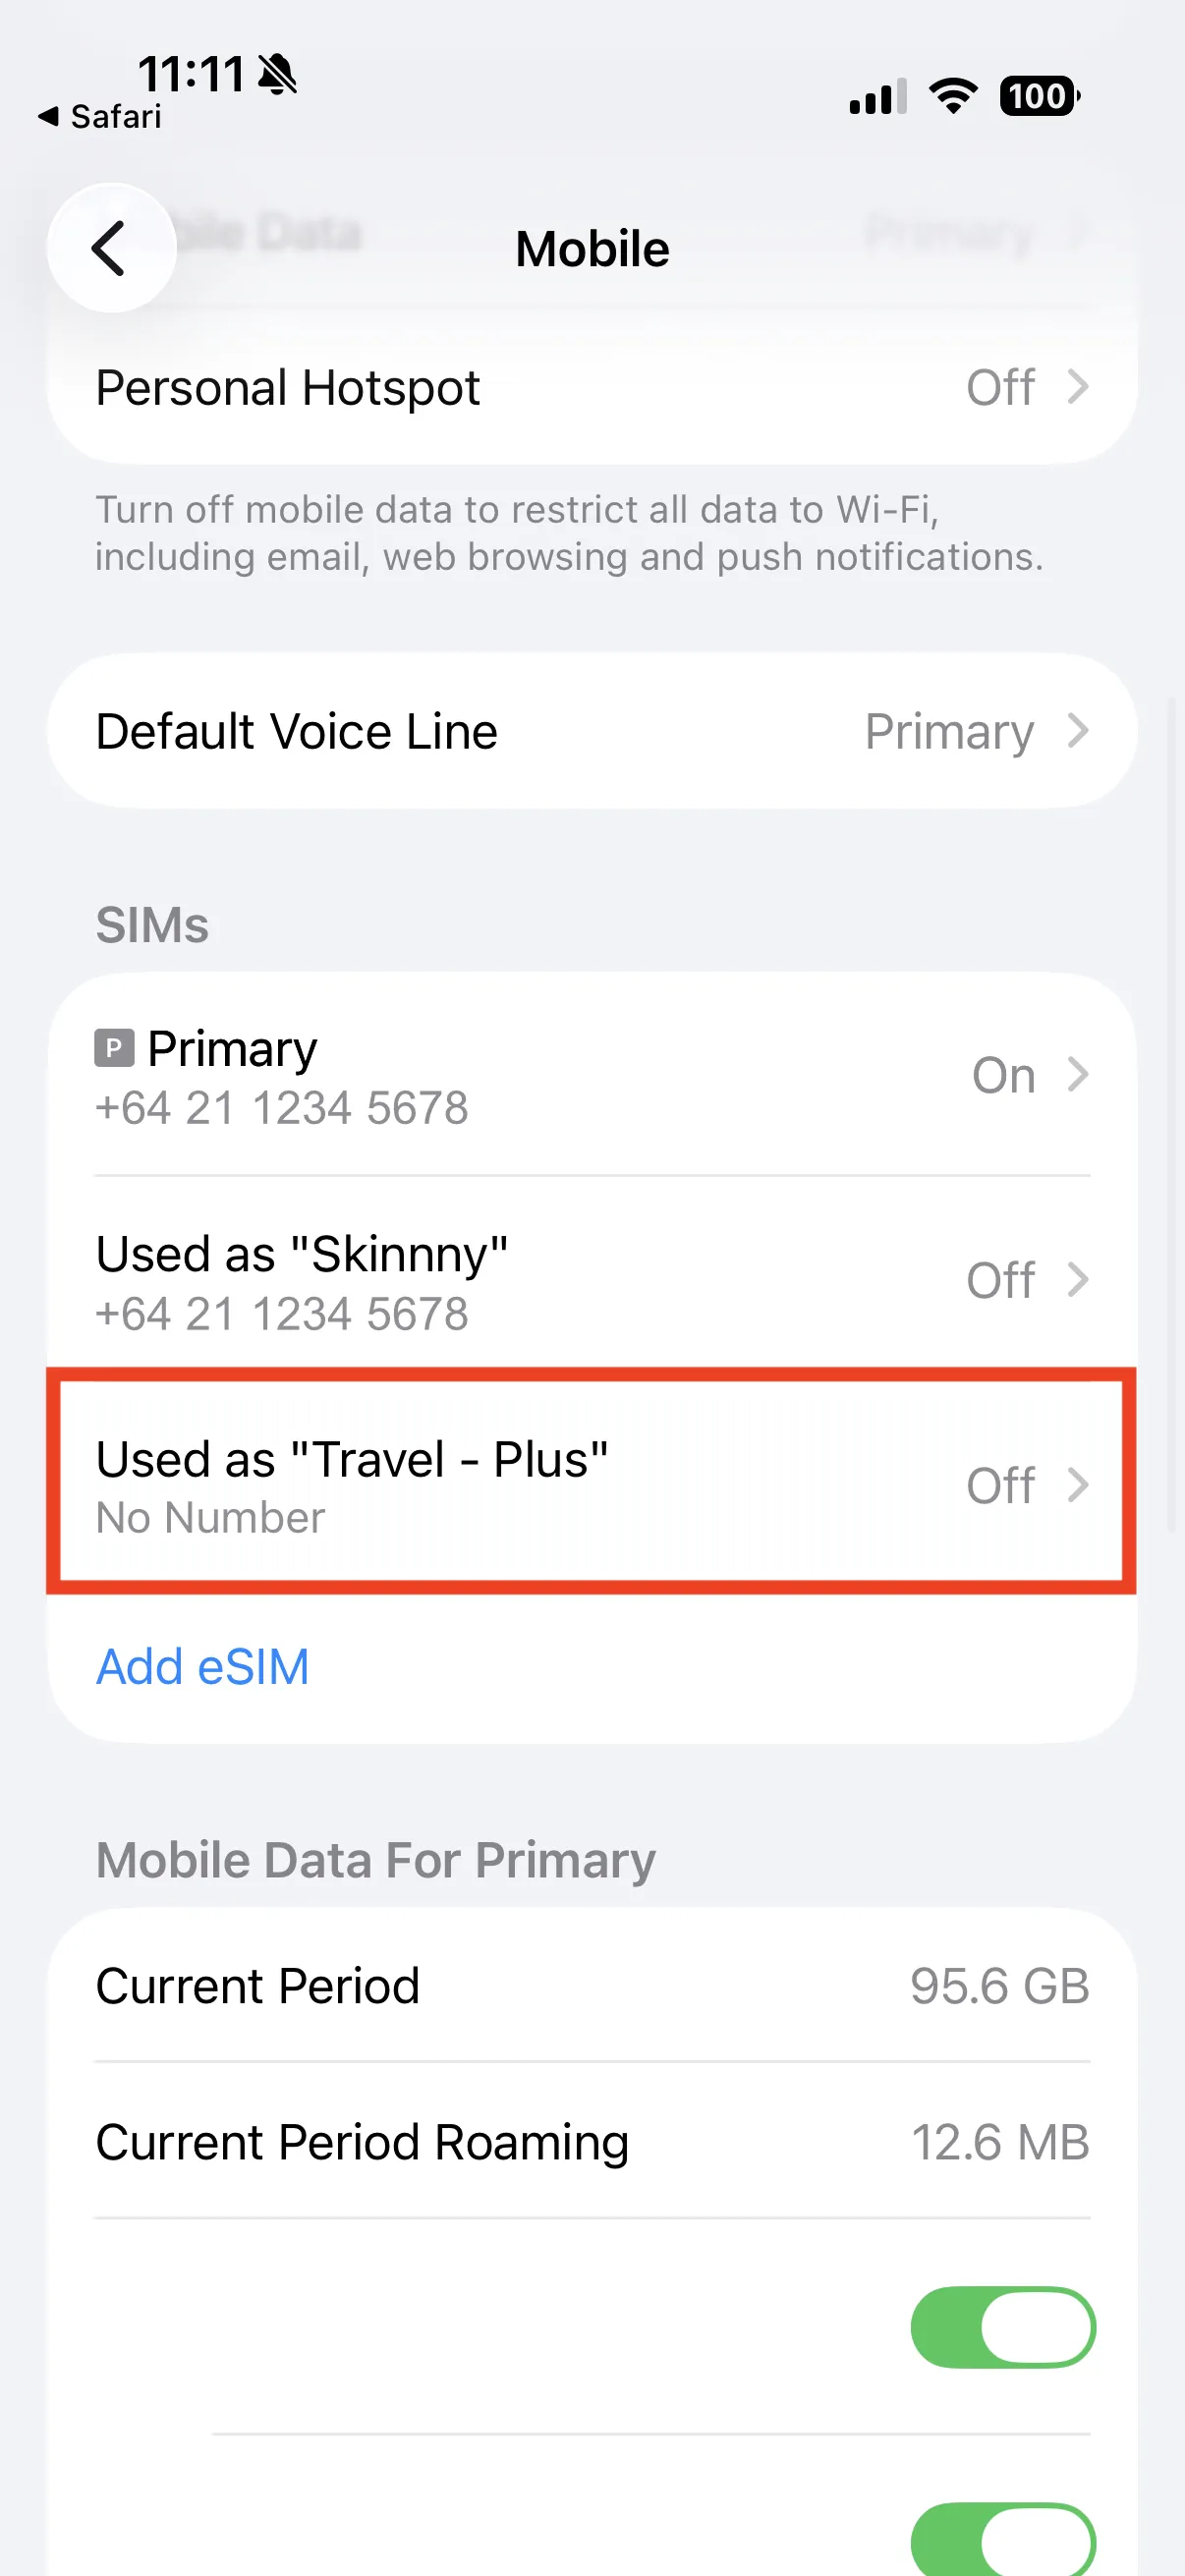
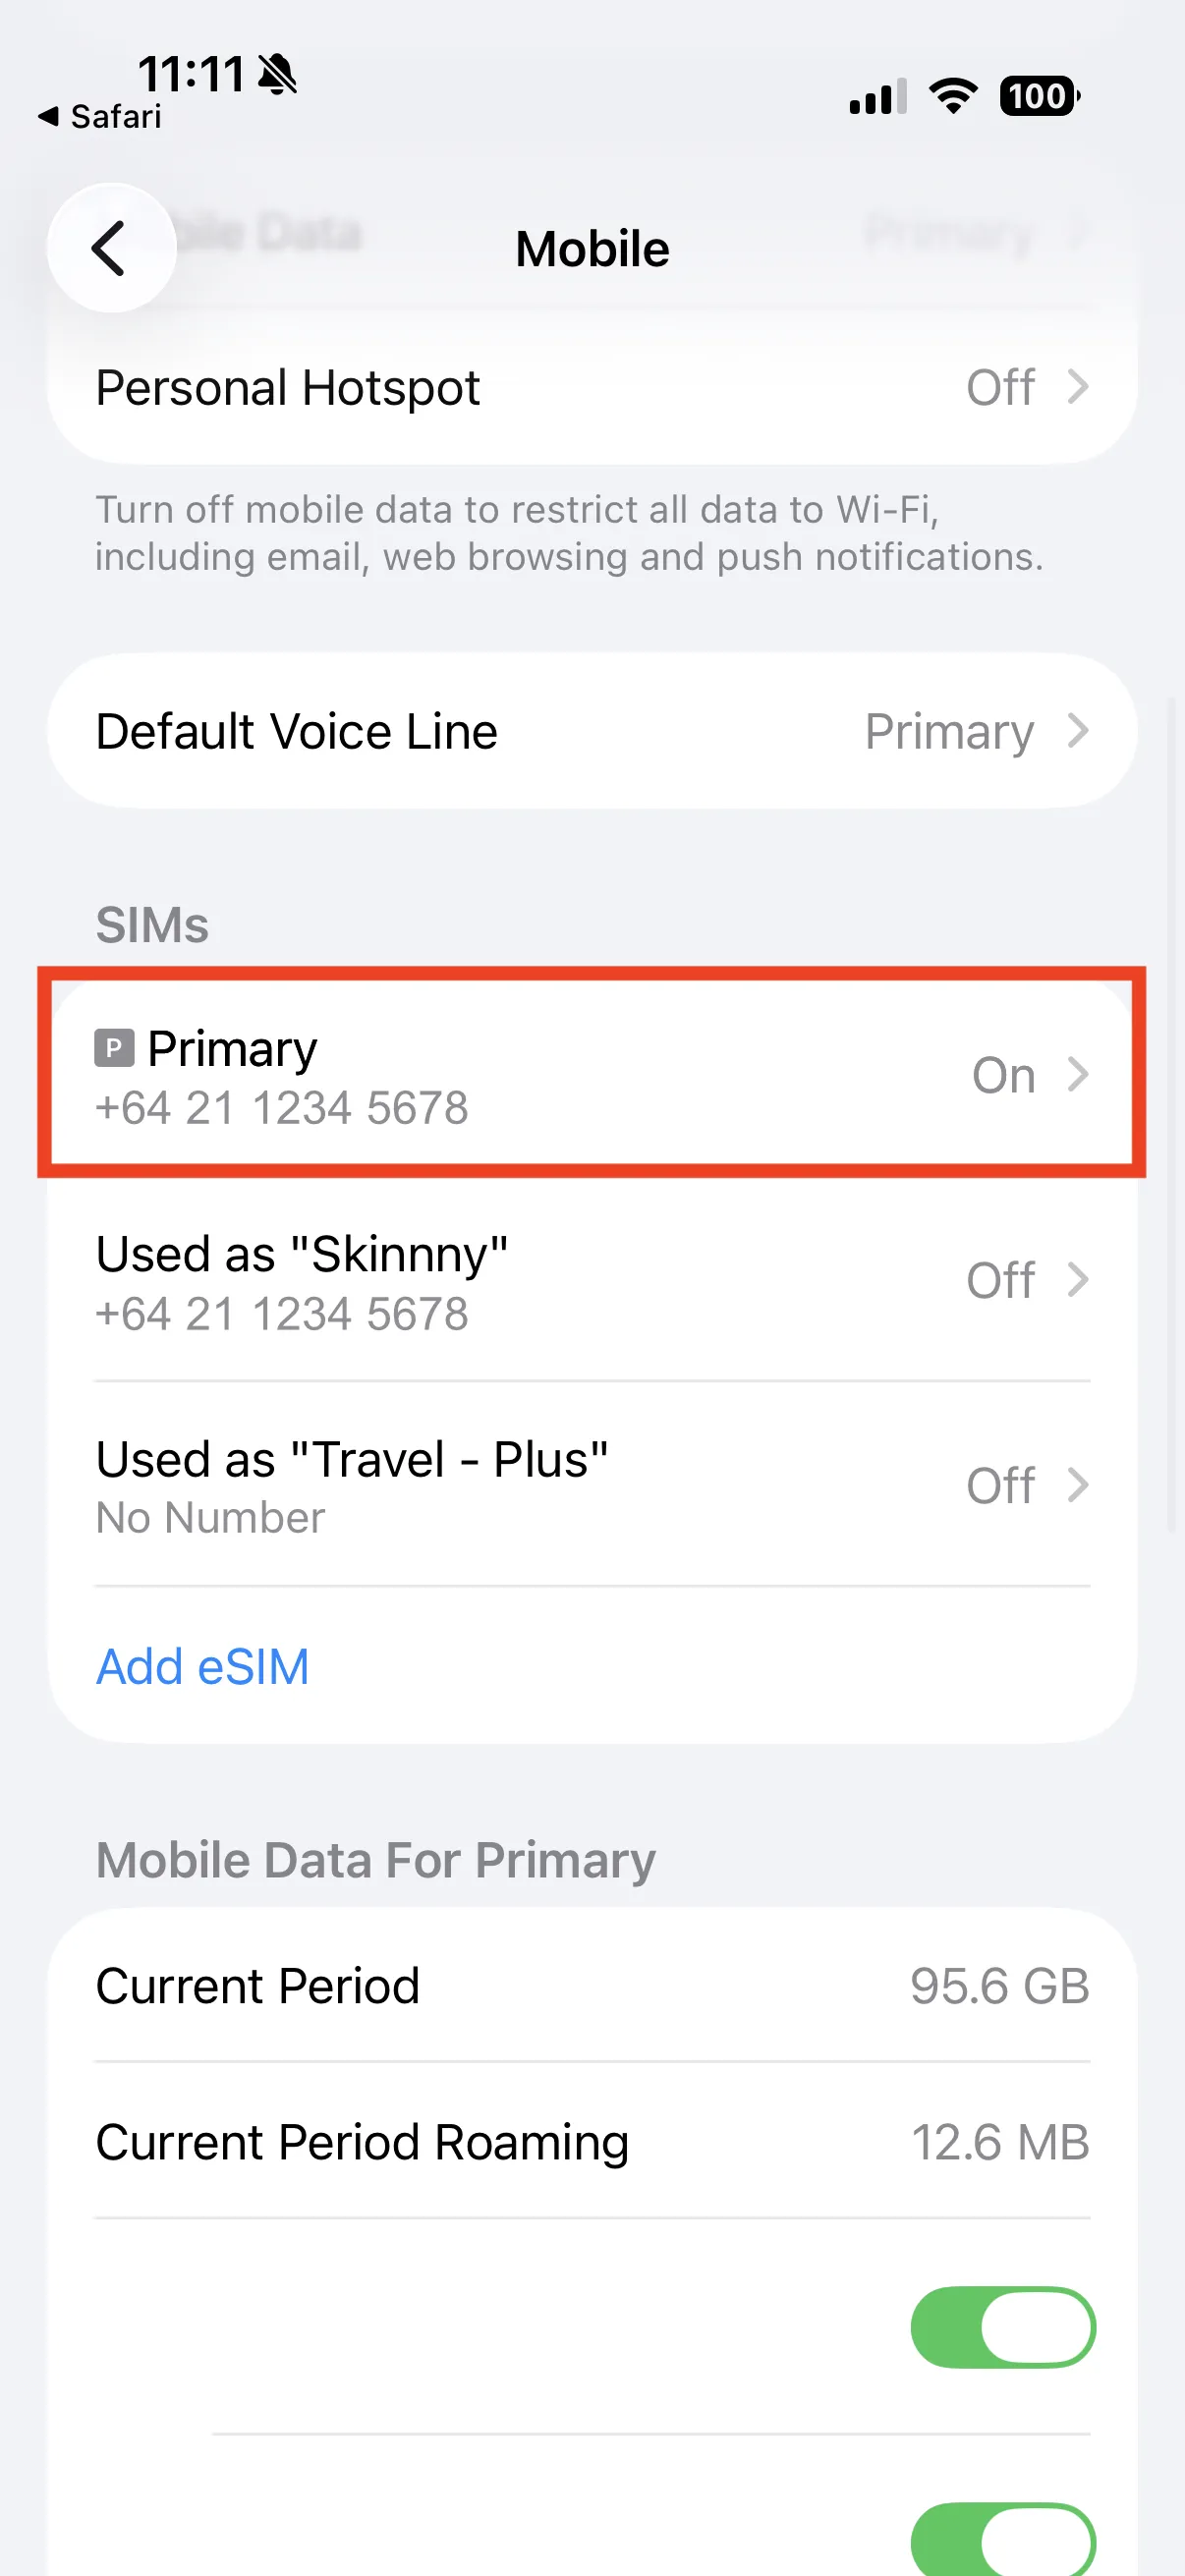
In Settings → Mobile Service, scroll down to the SIMs section. You will see your new travel eSIM listed alongside any SIMs you already had on your phone. Any SIM with a phone number next to it is one of your existing New Zealand provider SIMs, so leave those as they are. Your new eSIM is the extra line that has no phone number. Its name depends on the country you bought your plan for, so it might not say "KiwiSim". It often shows as "No Number" or the name of a local network.
Rename it to "KiwiSim"
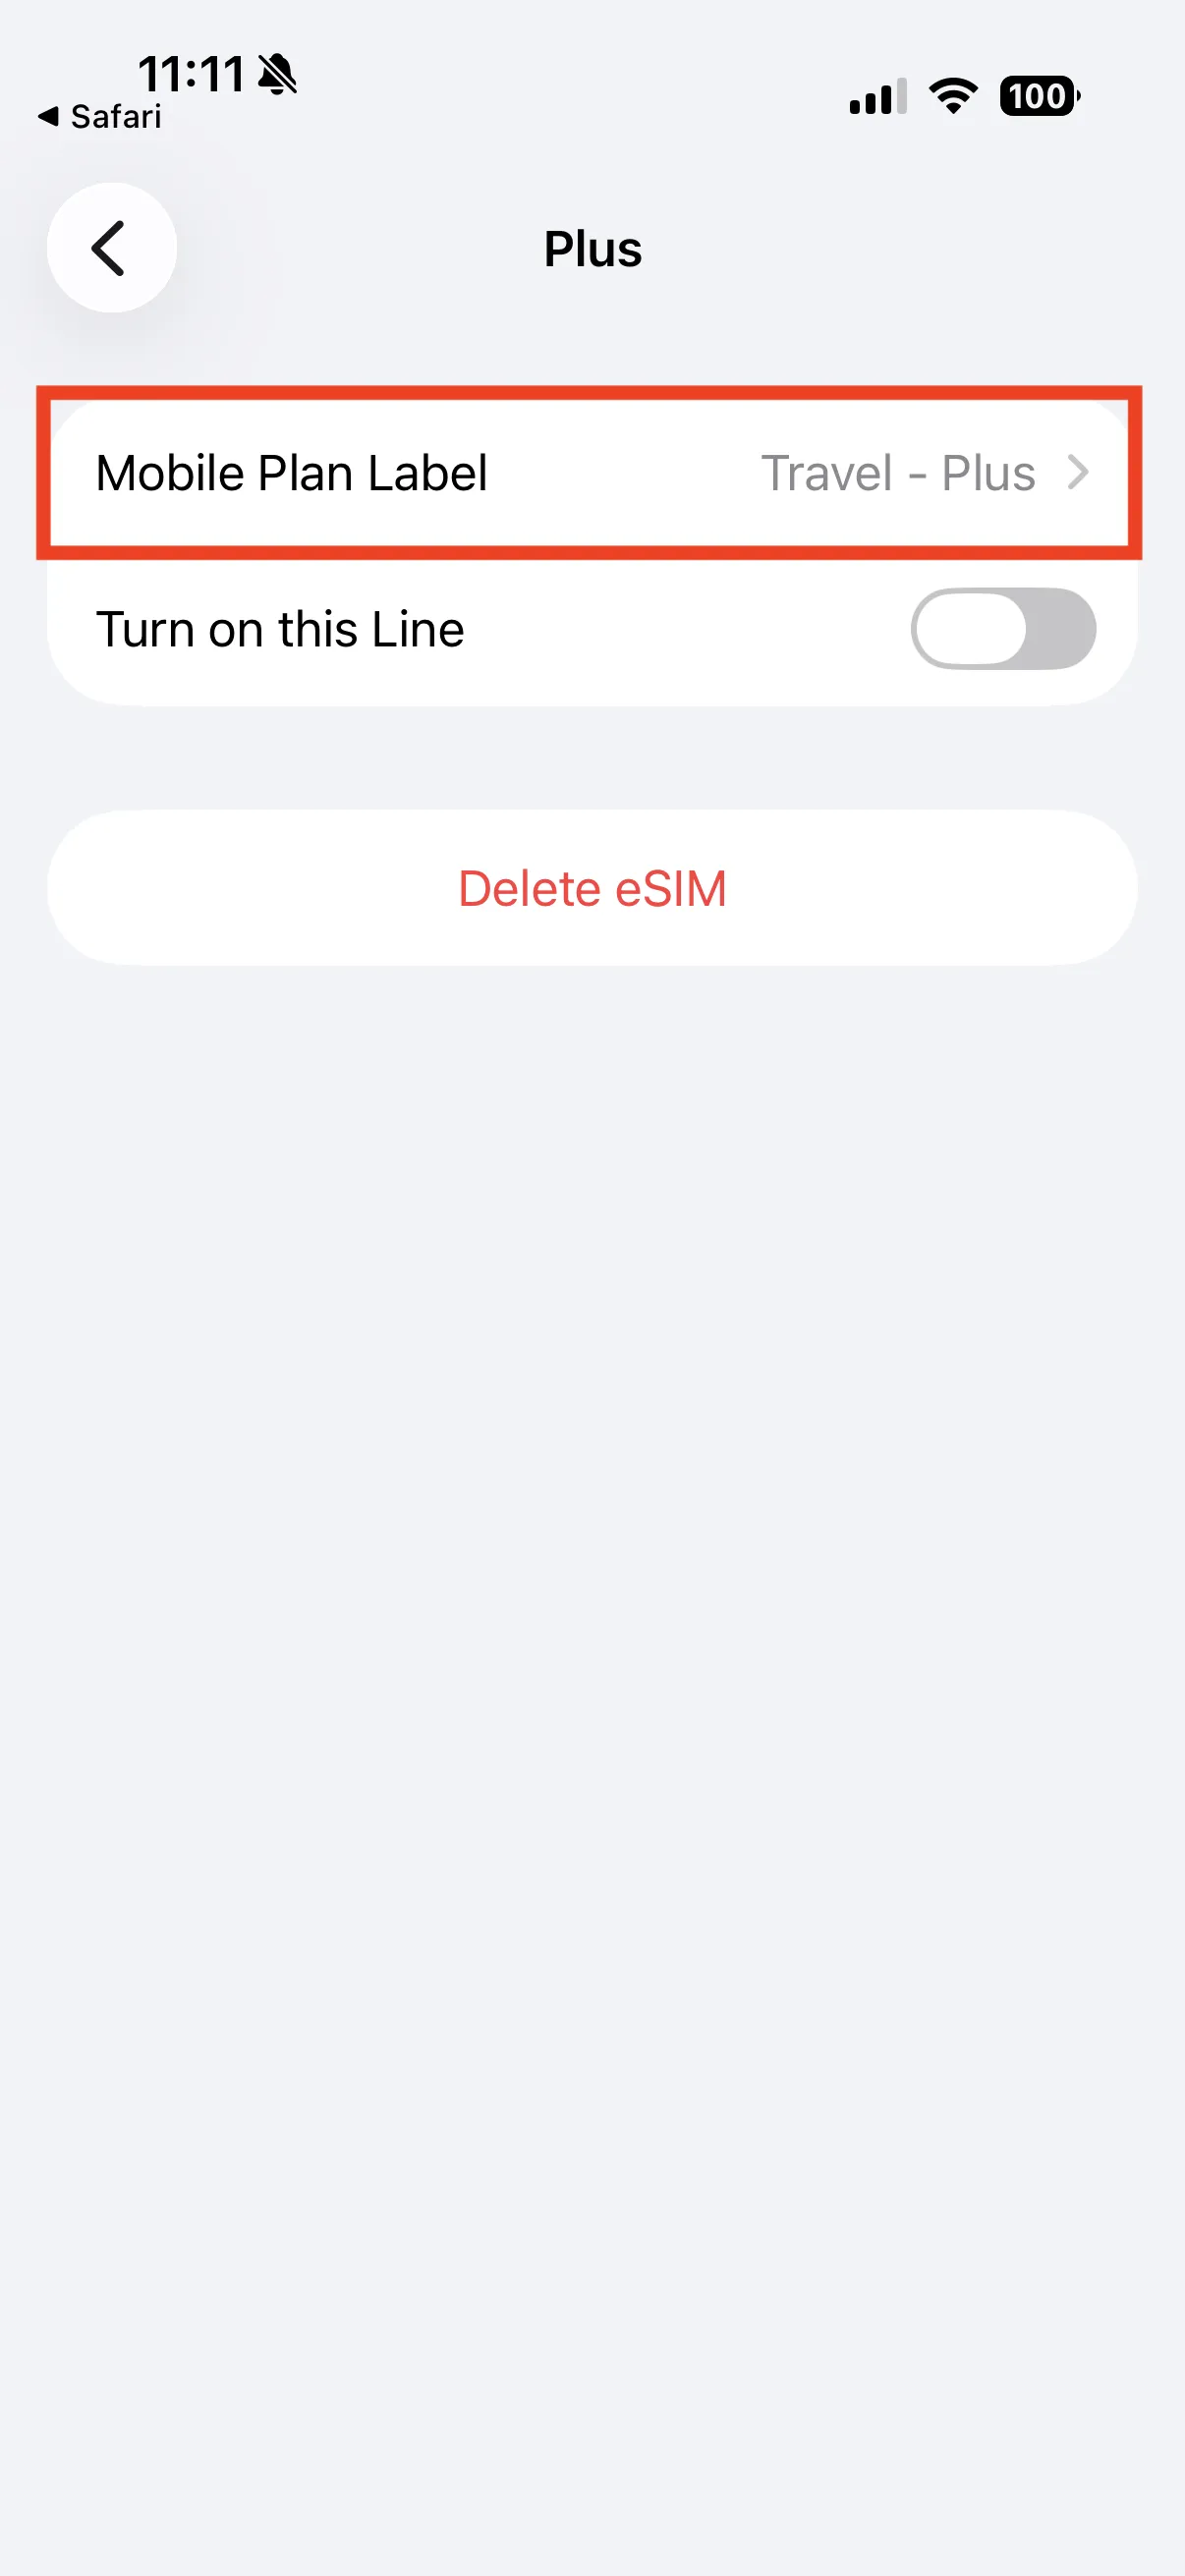
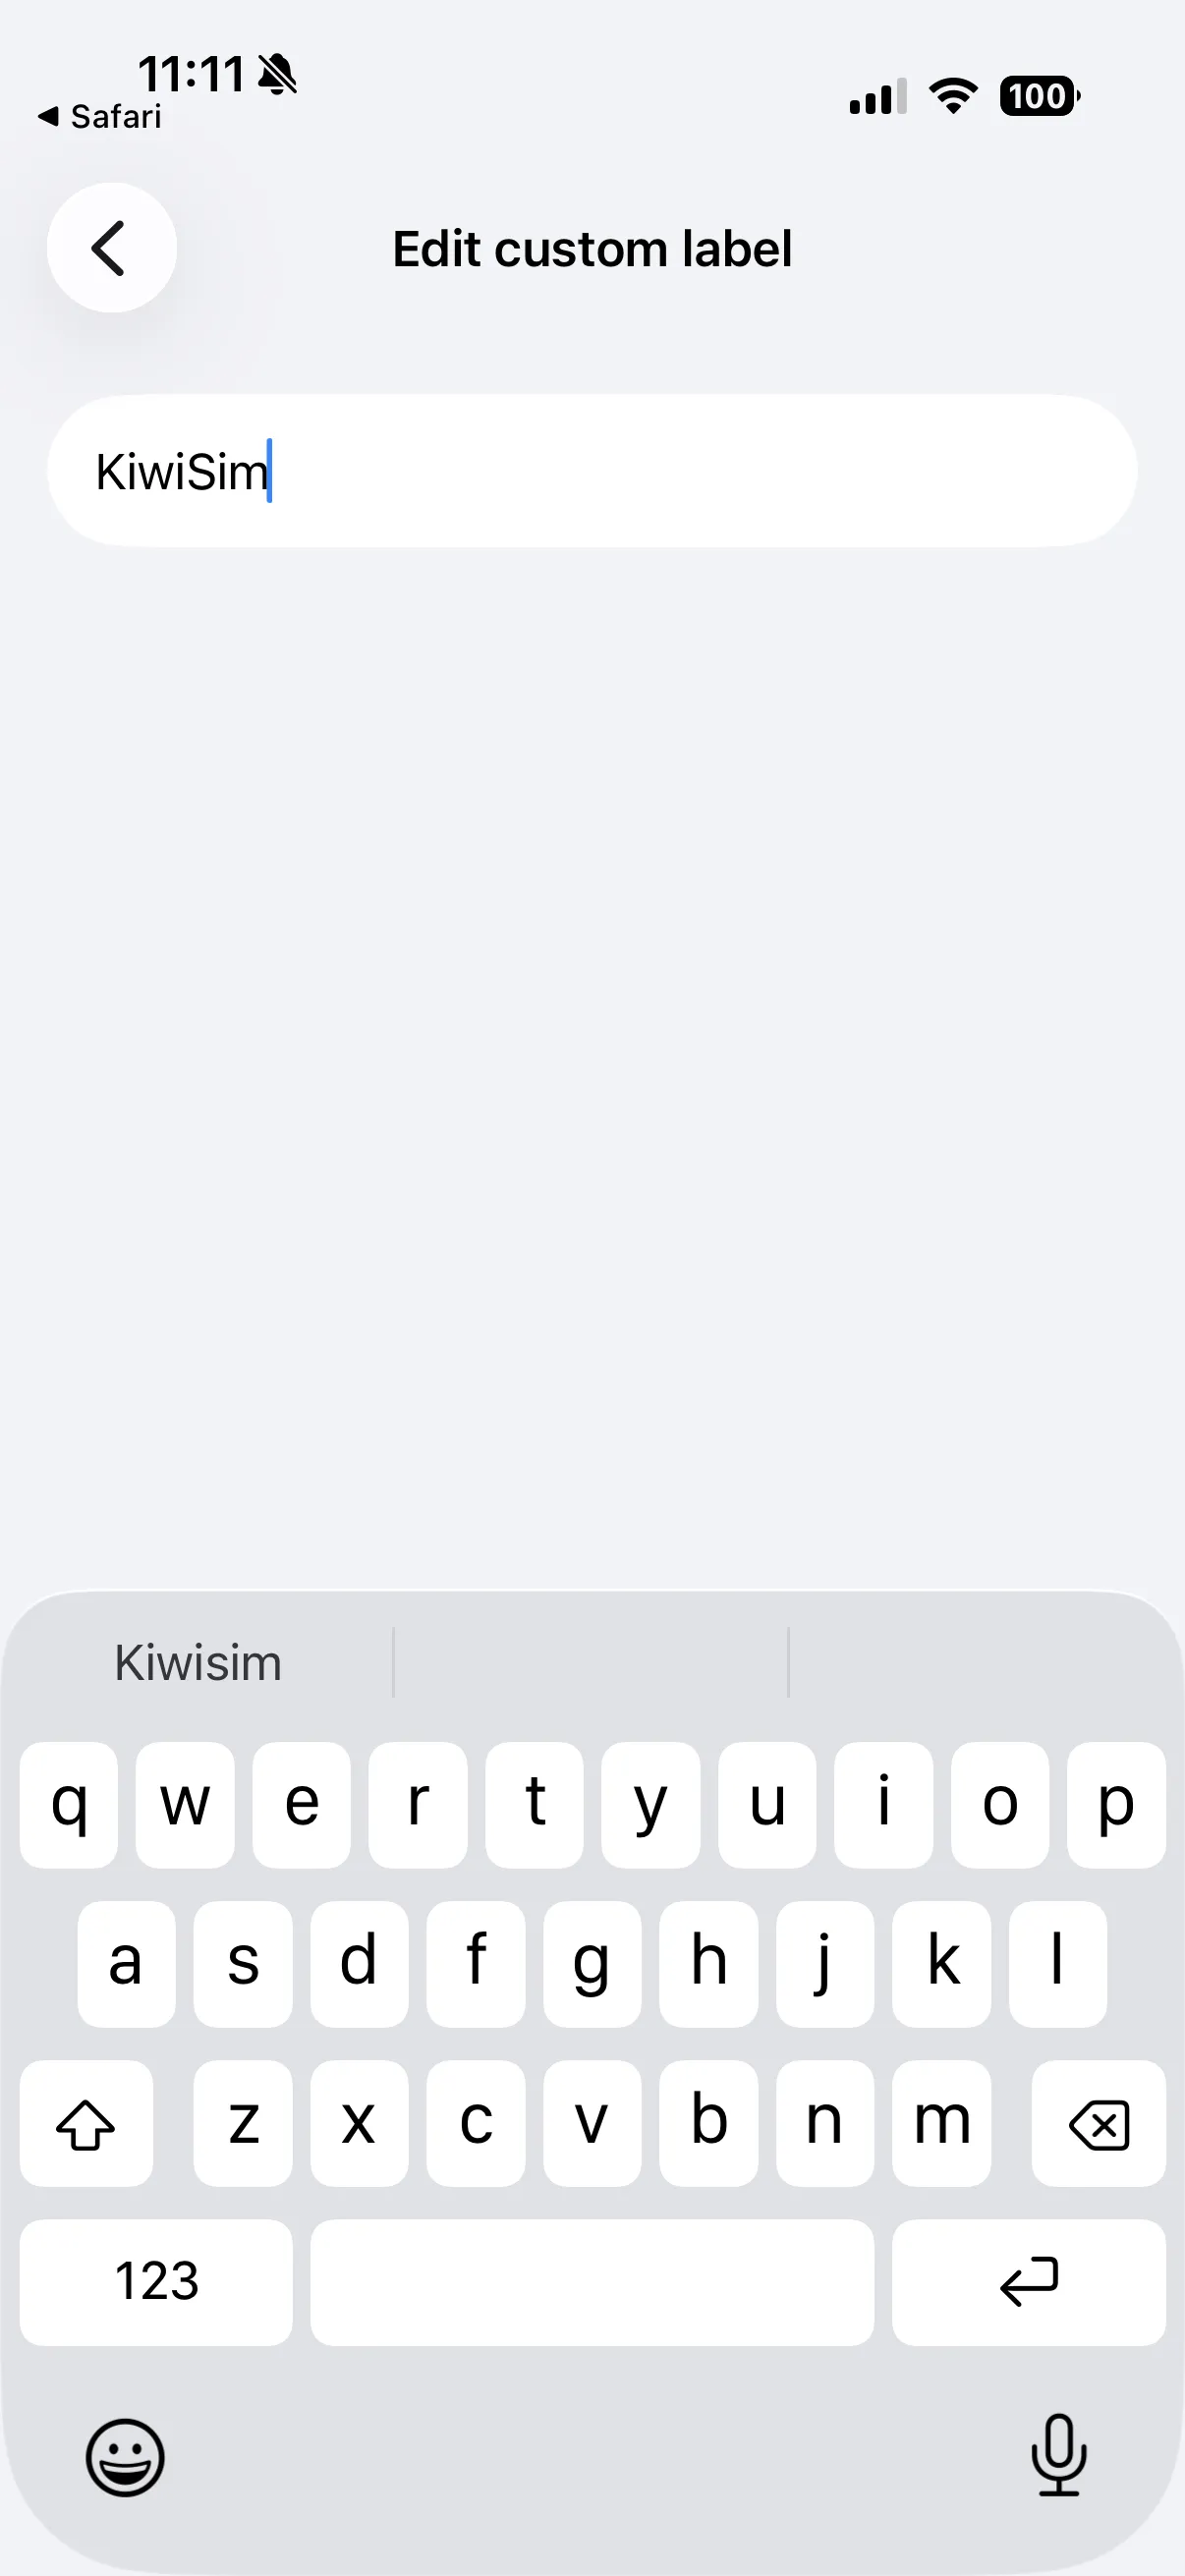
Tap your new eSIM, then tap the "eSIM Label" (Mobile Plan Label) and rename it to "KiwiSim" so it's easy to identify later.
Turn on the line
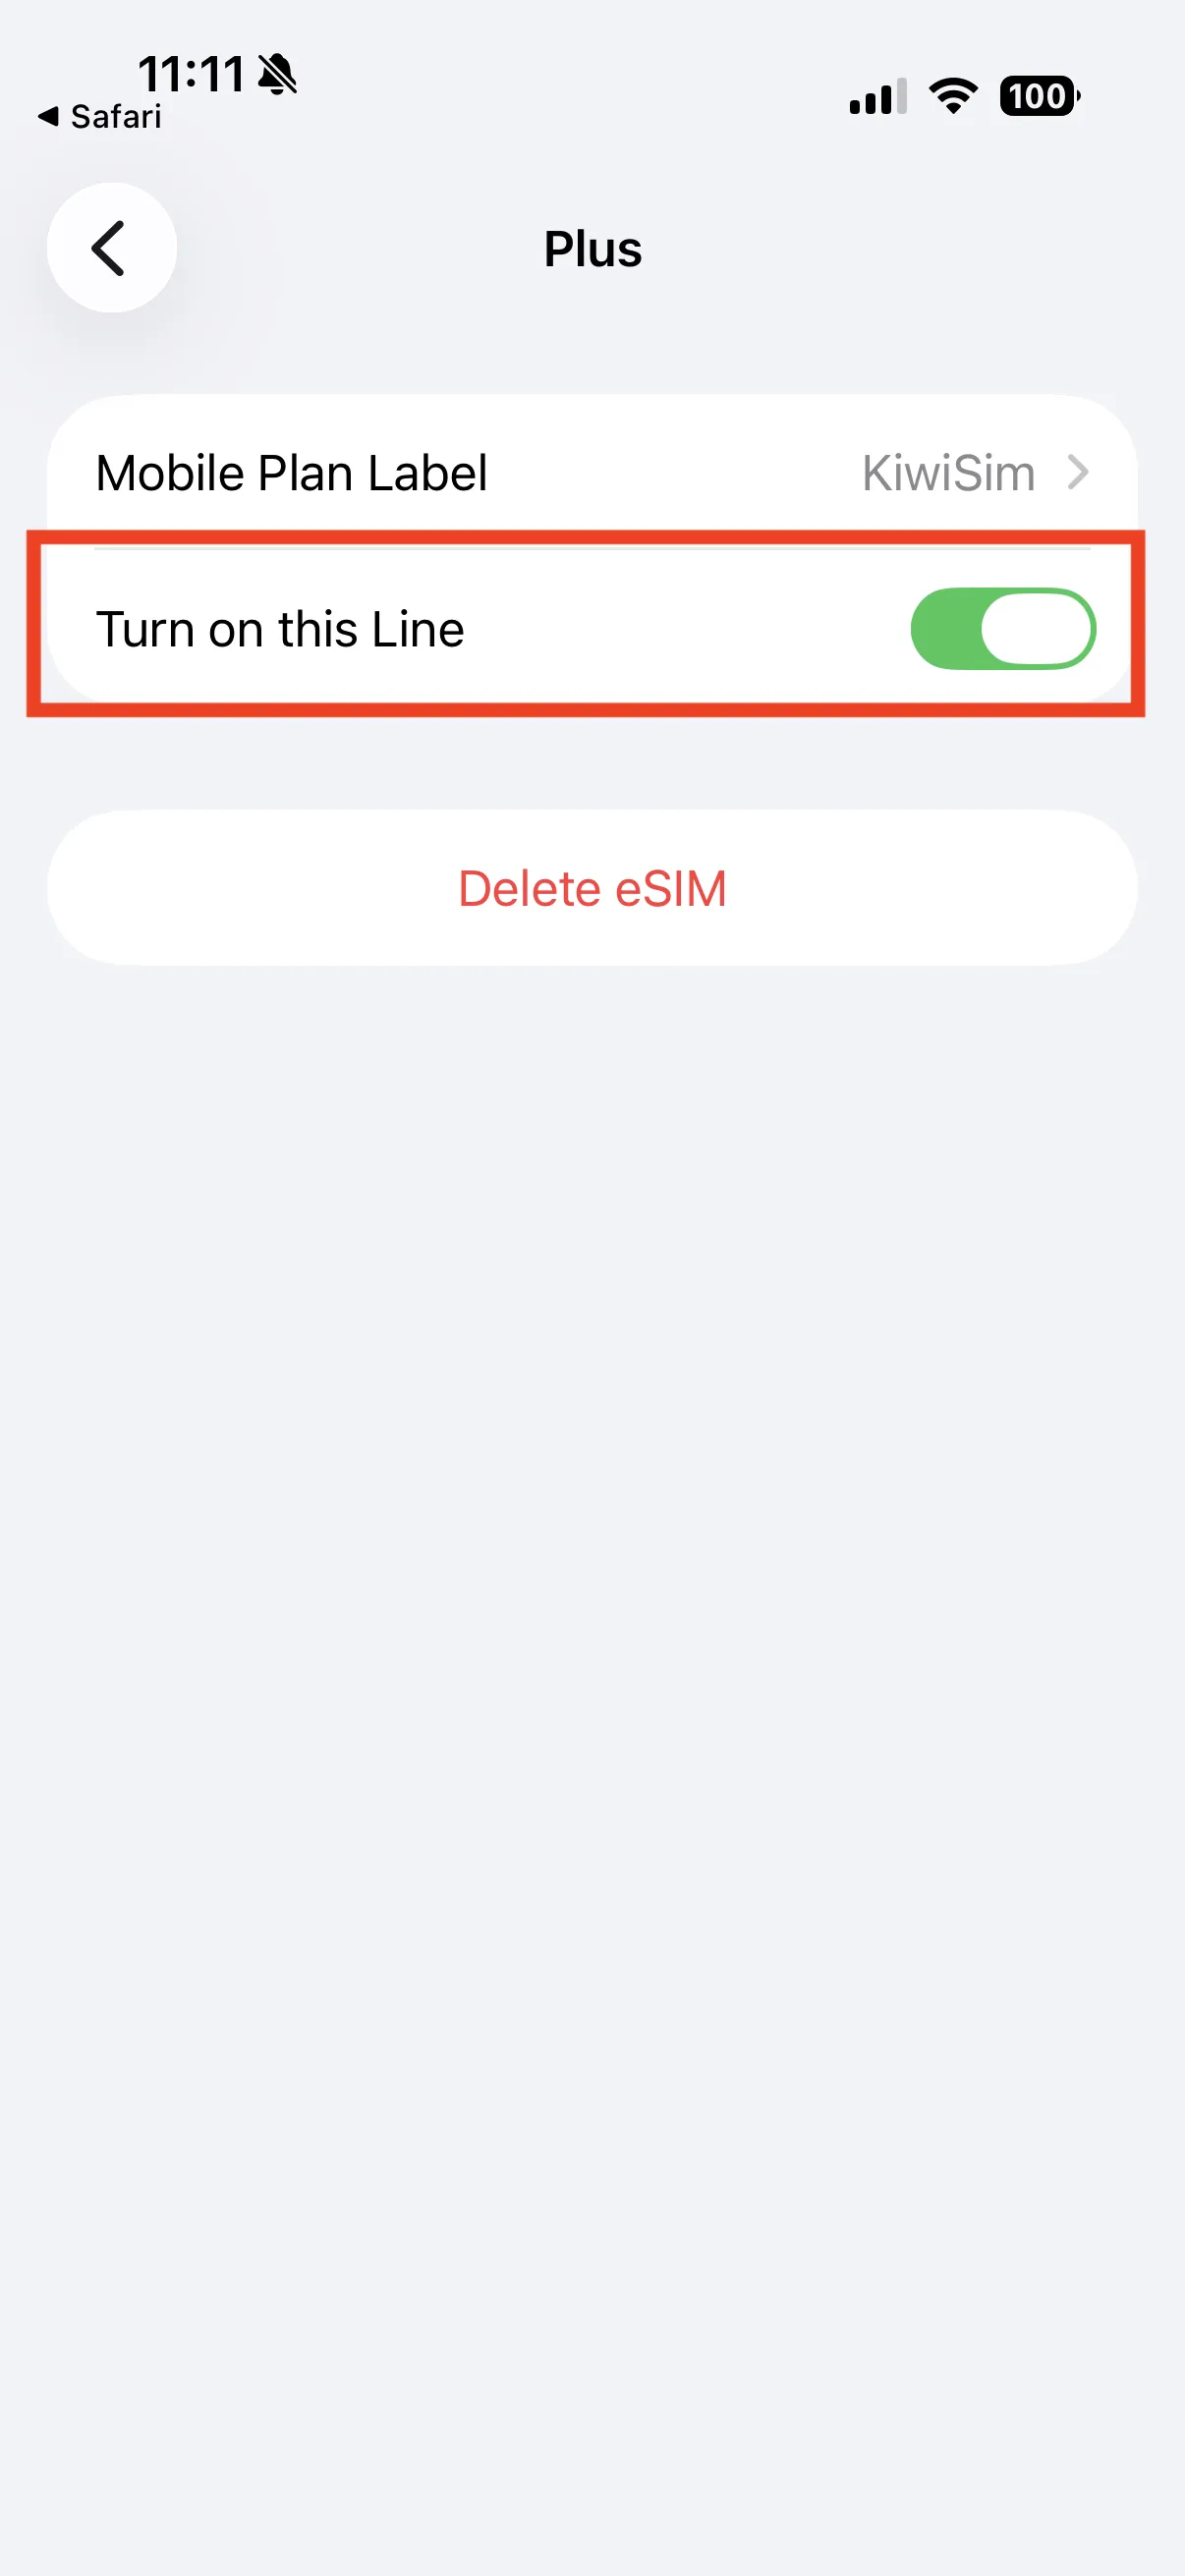
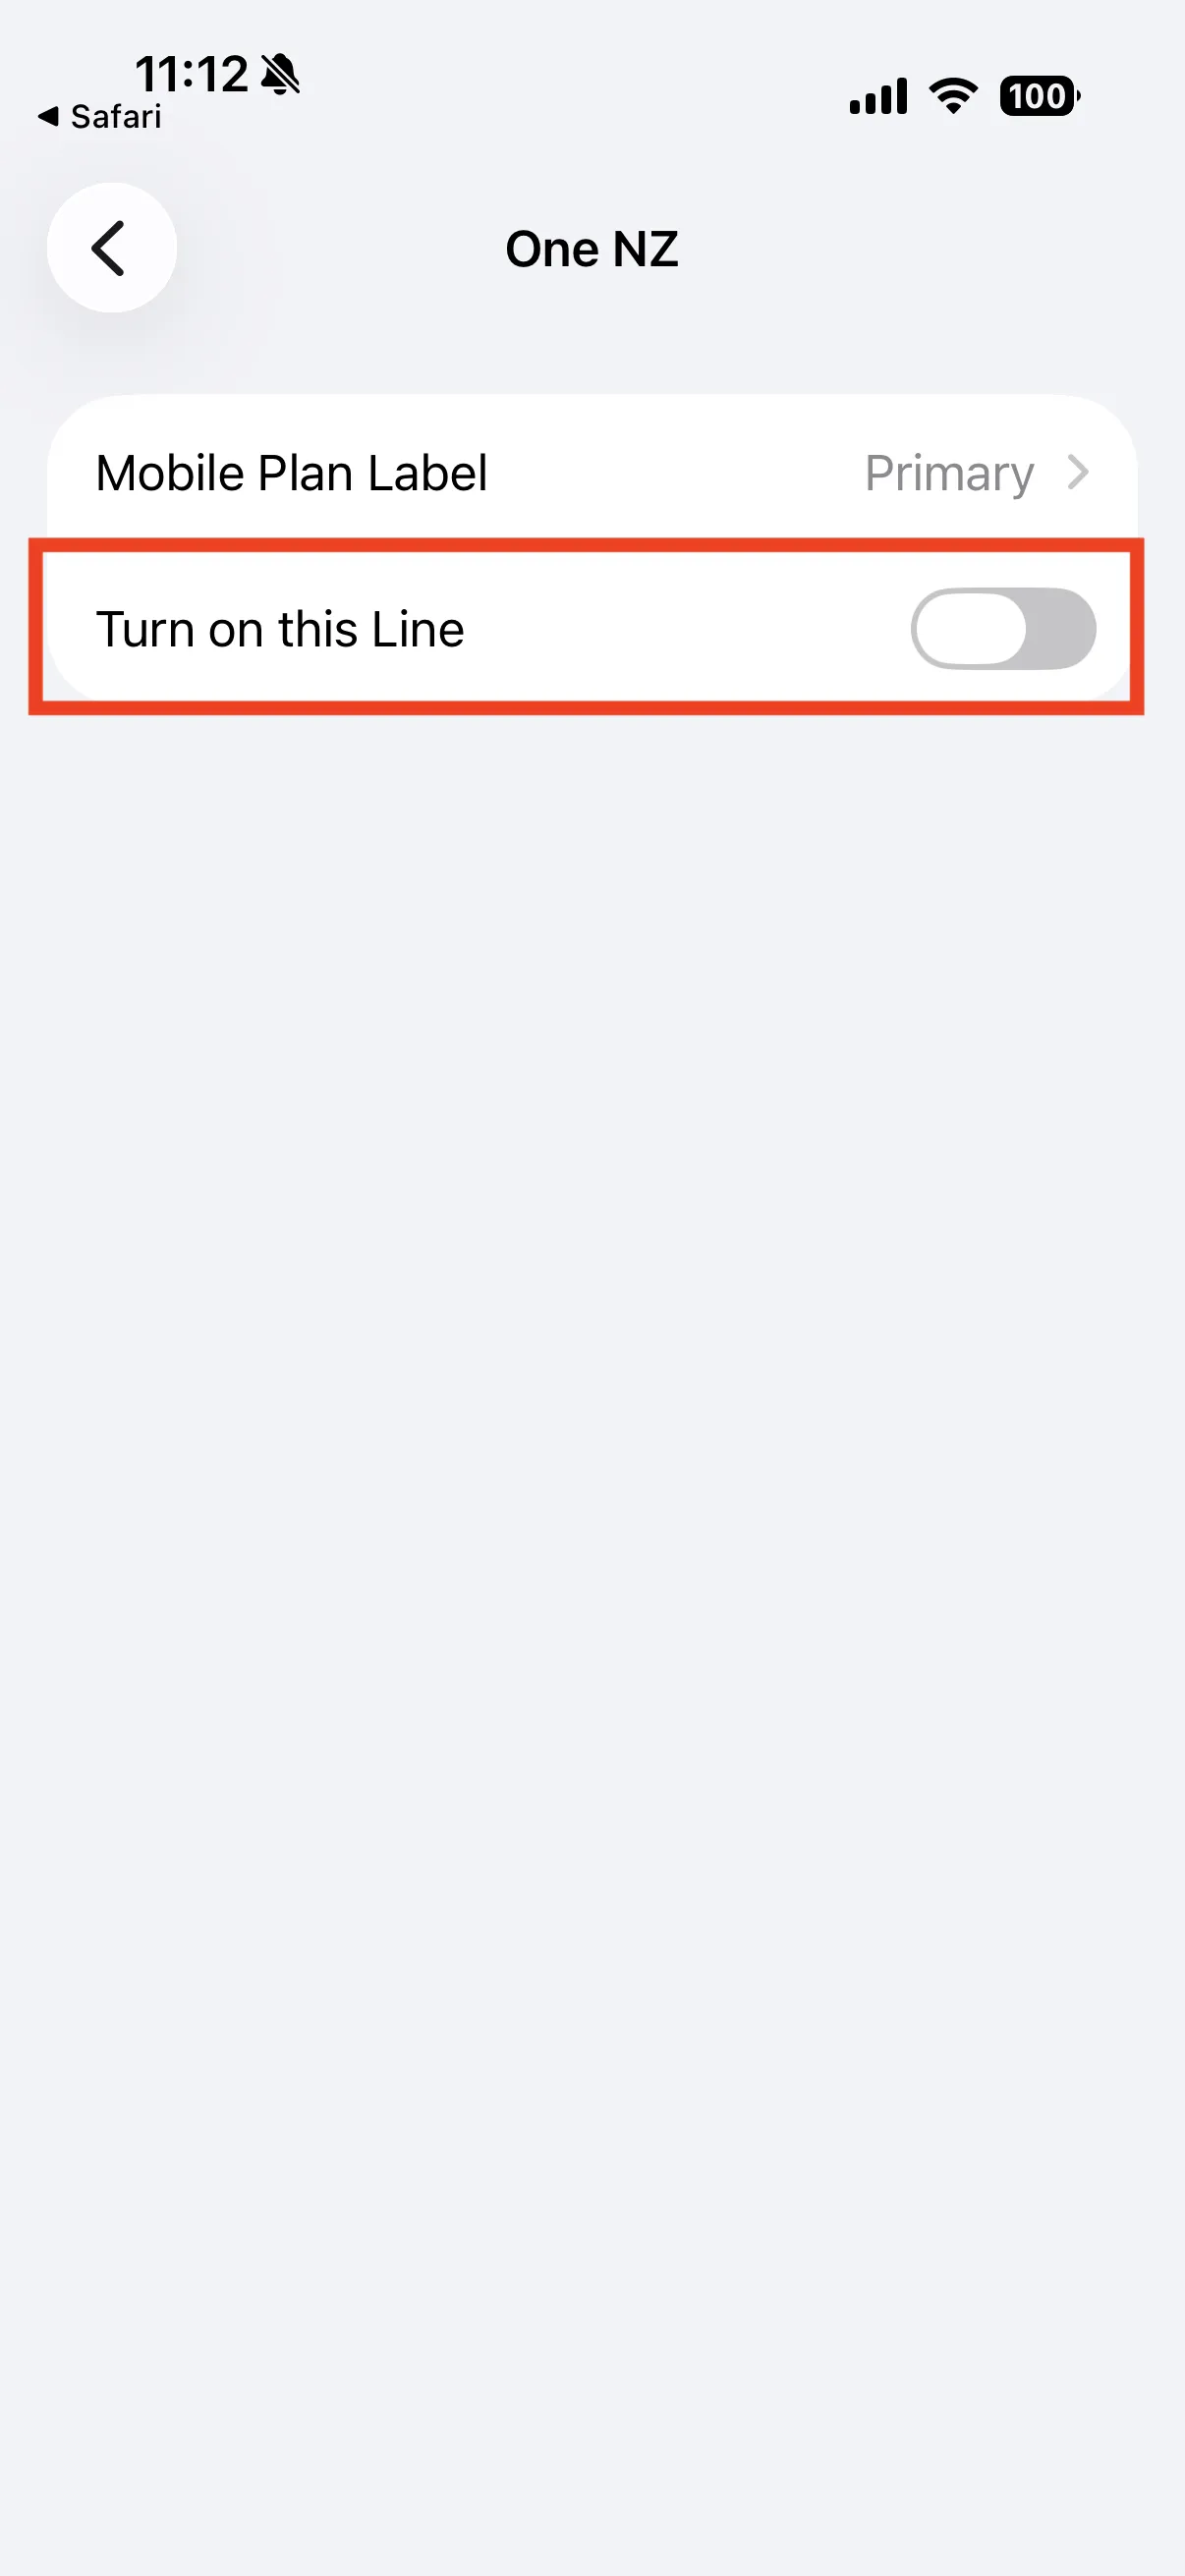
Back in the eSIM's settings, toggle on "Turn On This Line". It may take a minute or two for all of its settings to appear.
Turn on Data Roaming
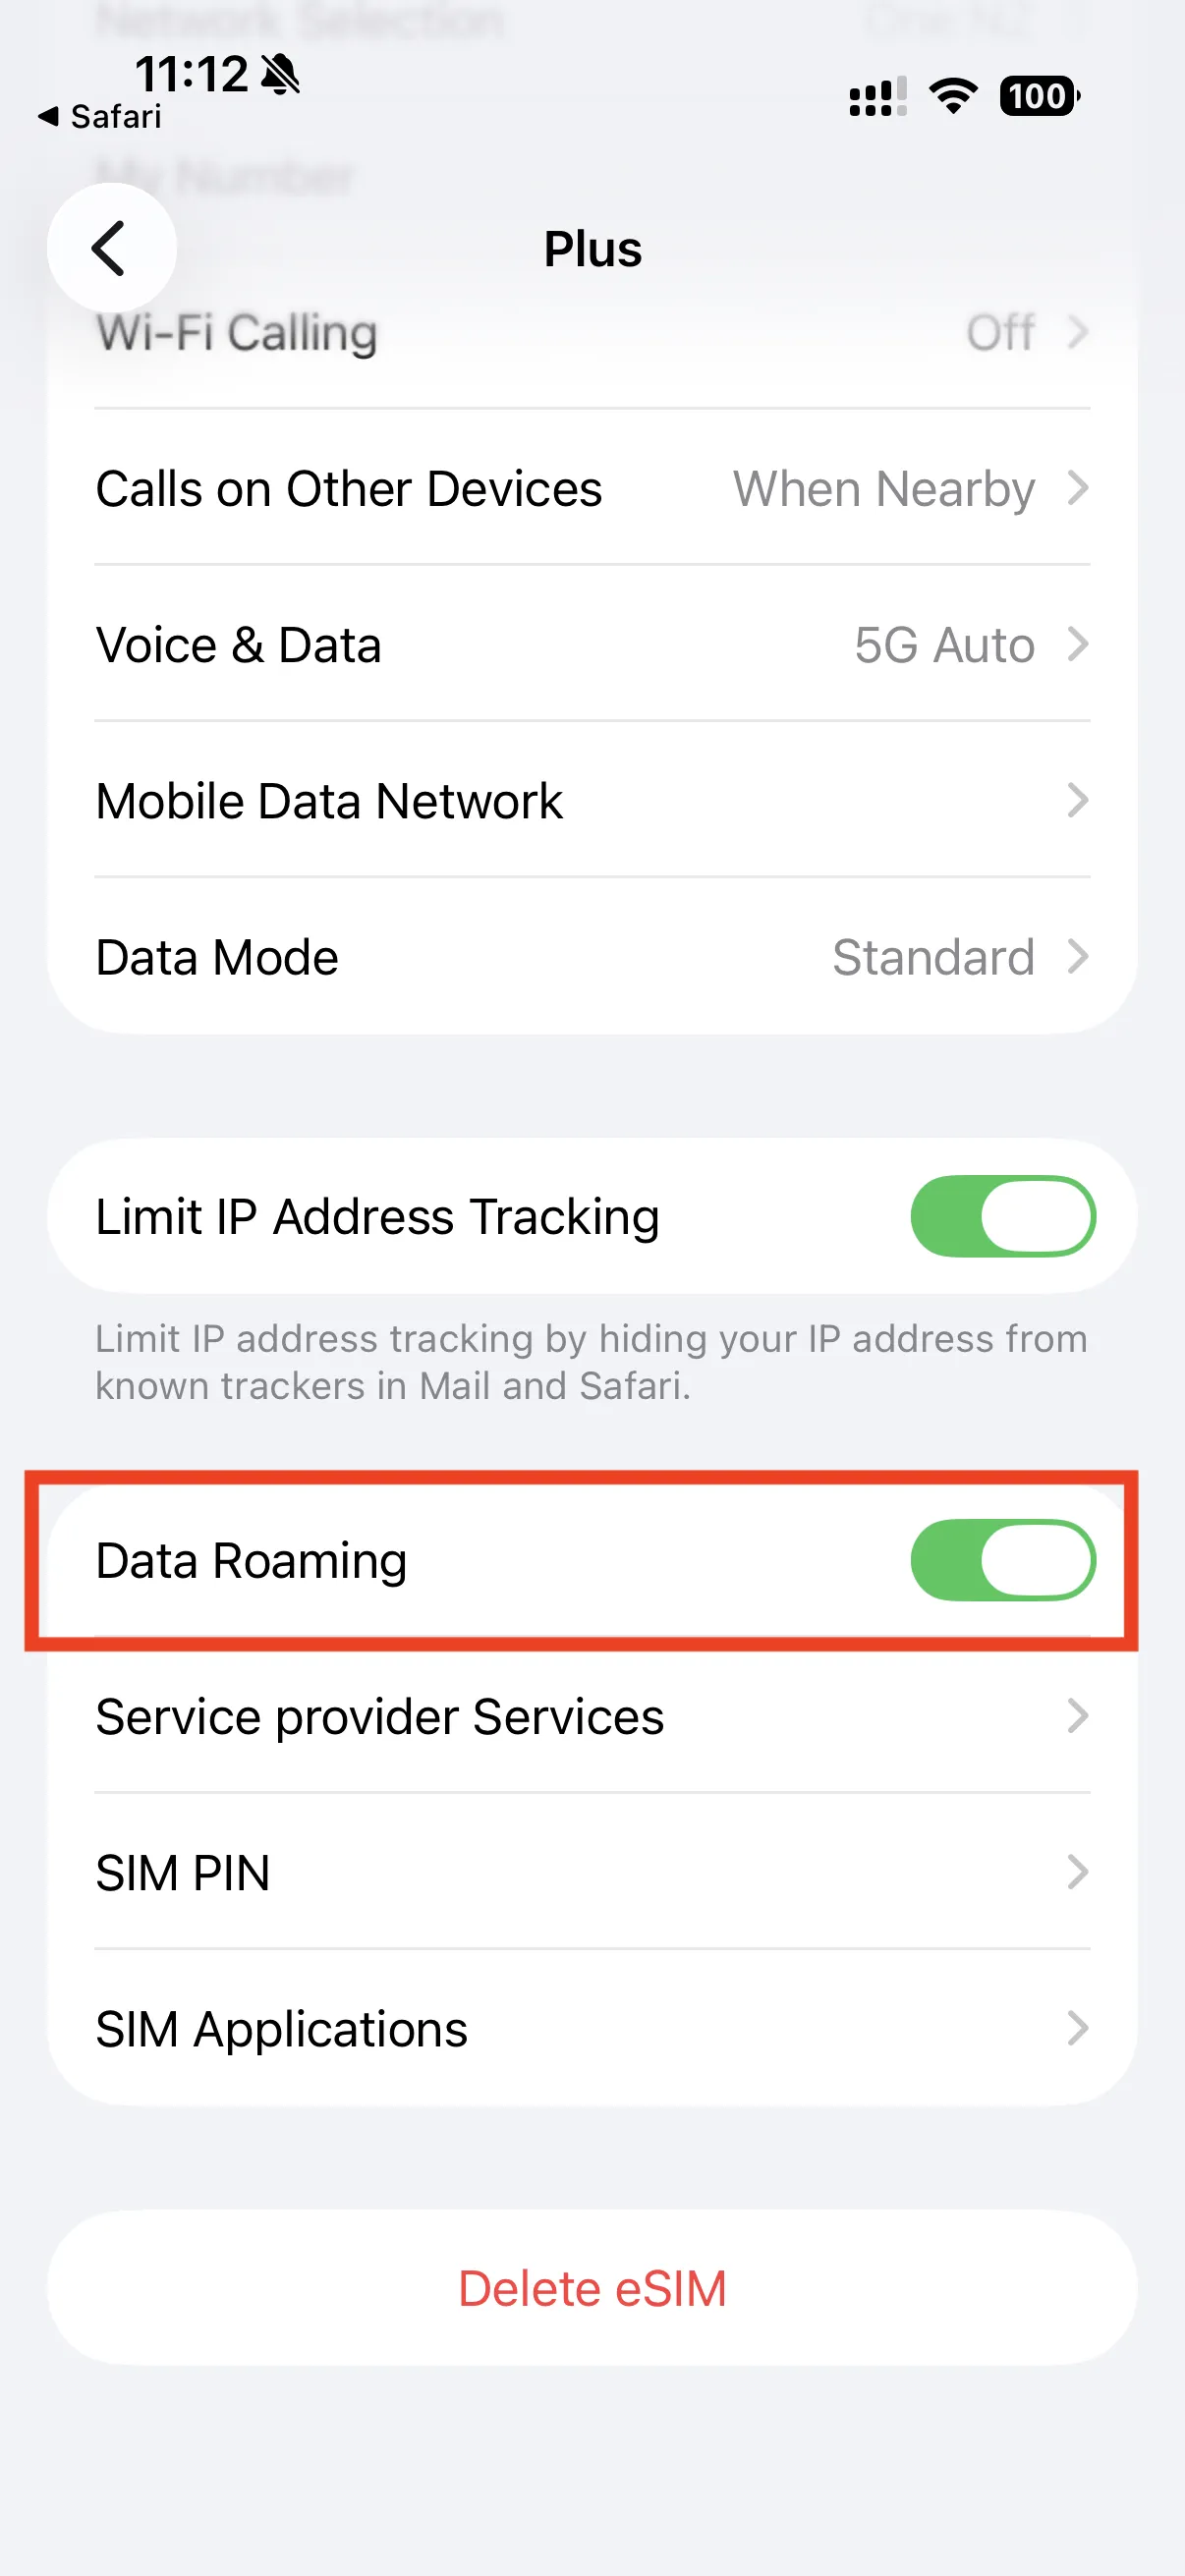
Scroll down to "Data Roaming" and switch it on. This is required for your travel data to work — don't skip it!
Set KiwiSim as your data line
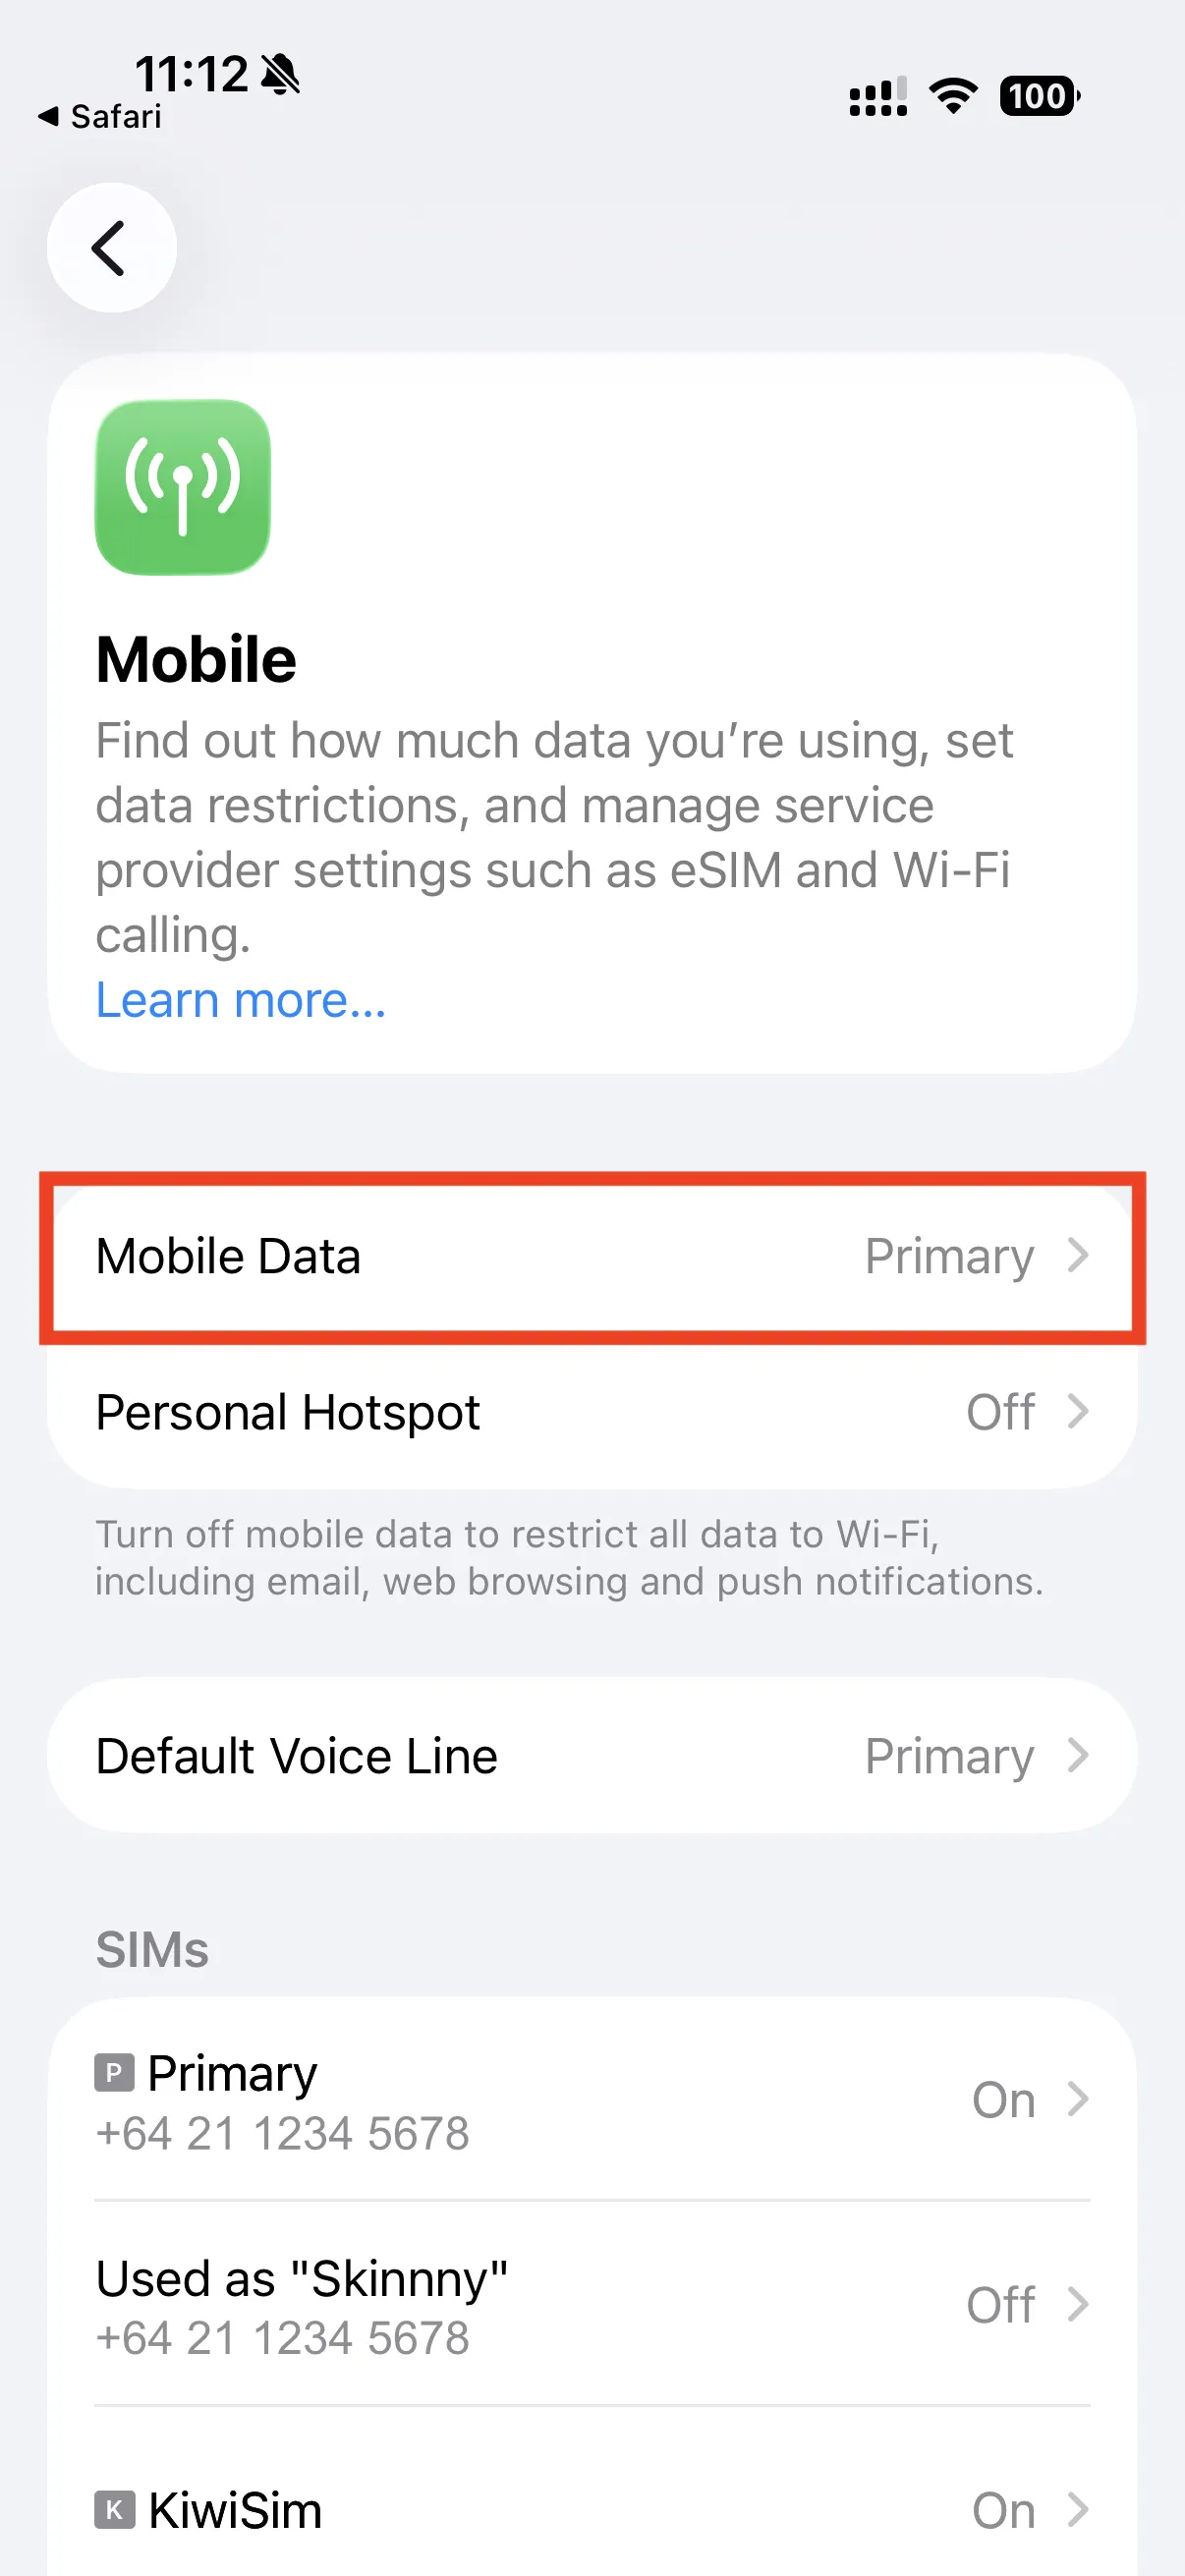
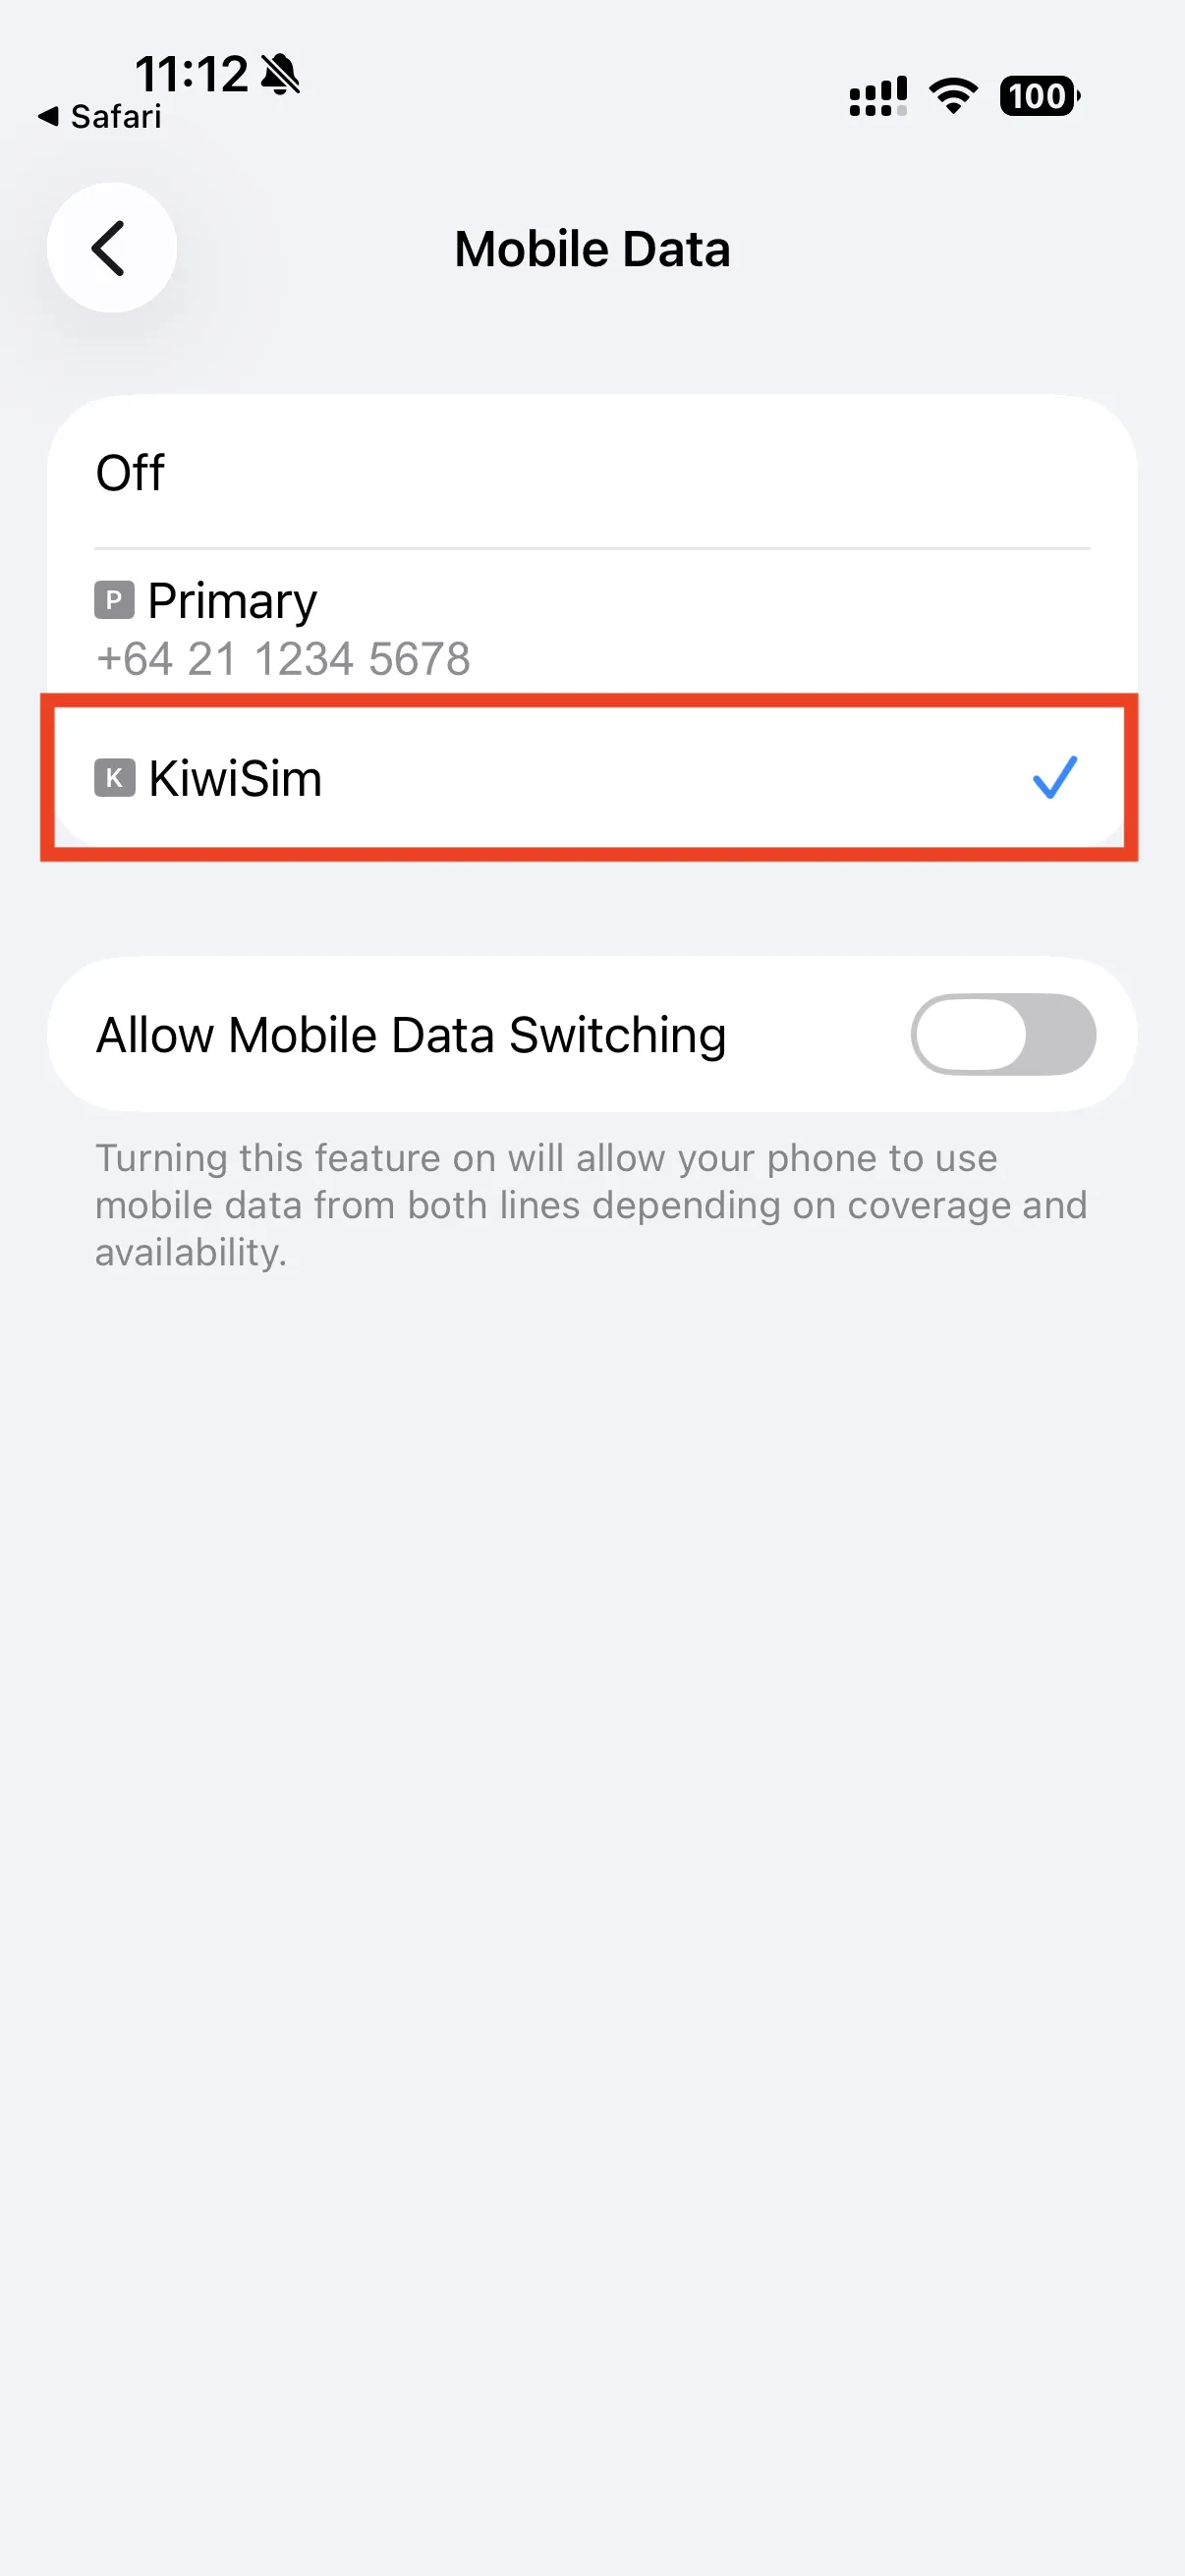
Go back to the main Mobile Service page, tap "Mobile Data" at the top, and select your KiwiSim eSIM so your iPhone uses it for data.
Turn off your NZ SIM (optional)
To be certain you're not charged roaming fees by your NZ provider, tap your primary SIM and toggle off "Turn On This Line". You can turn it back on the same way once you're home.
When you arrive
Already at your destination?
You should now be connected to one of our partner networks and able to use the internet as normal.
Setting up before you leave?
Switch "Mobile Data" back to your NZ SIM so you keep your normal plan until you fly. When you land, turn your KiwiSim eSIM back on, set "Mobile Data" to KiwiSim, and optionally turn off your primary SIM.
Troubleshooting
Not connecting? Restart your iPhone first — hold the Volume Up and Side (power) buttons together, then slide to power off. Turn it back on and check again.
Still having trouble? Contact our support team and we'll help you get connected.